
How to make a garden tool rack from one 2x4
I recently noticed that my garage was getting a bit messy. I needed a way to hang some of my garden tools on the wall to keep them out of the way when not in use. I also wanted to make something from scratch in order to keep learning the basics of wood working that are useful for gardeners.
So I searched the internet for a simple garden tool rack and I found a few good ideas, but none that I really loved. They all looked a bit cheap or they required a lot of lumber.
I've seen the price of lumber, so I wanted to keep this build small. In fact, I wanted to build the entire thing out of a single eight foot long 2x4.
I scratched out a design, built it in one day, and I thought the result was good enough to share.
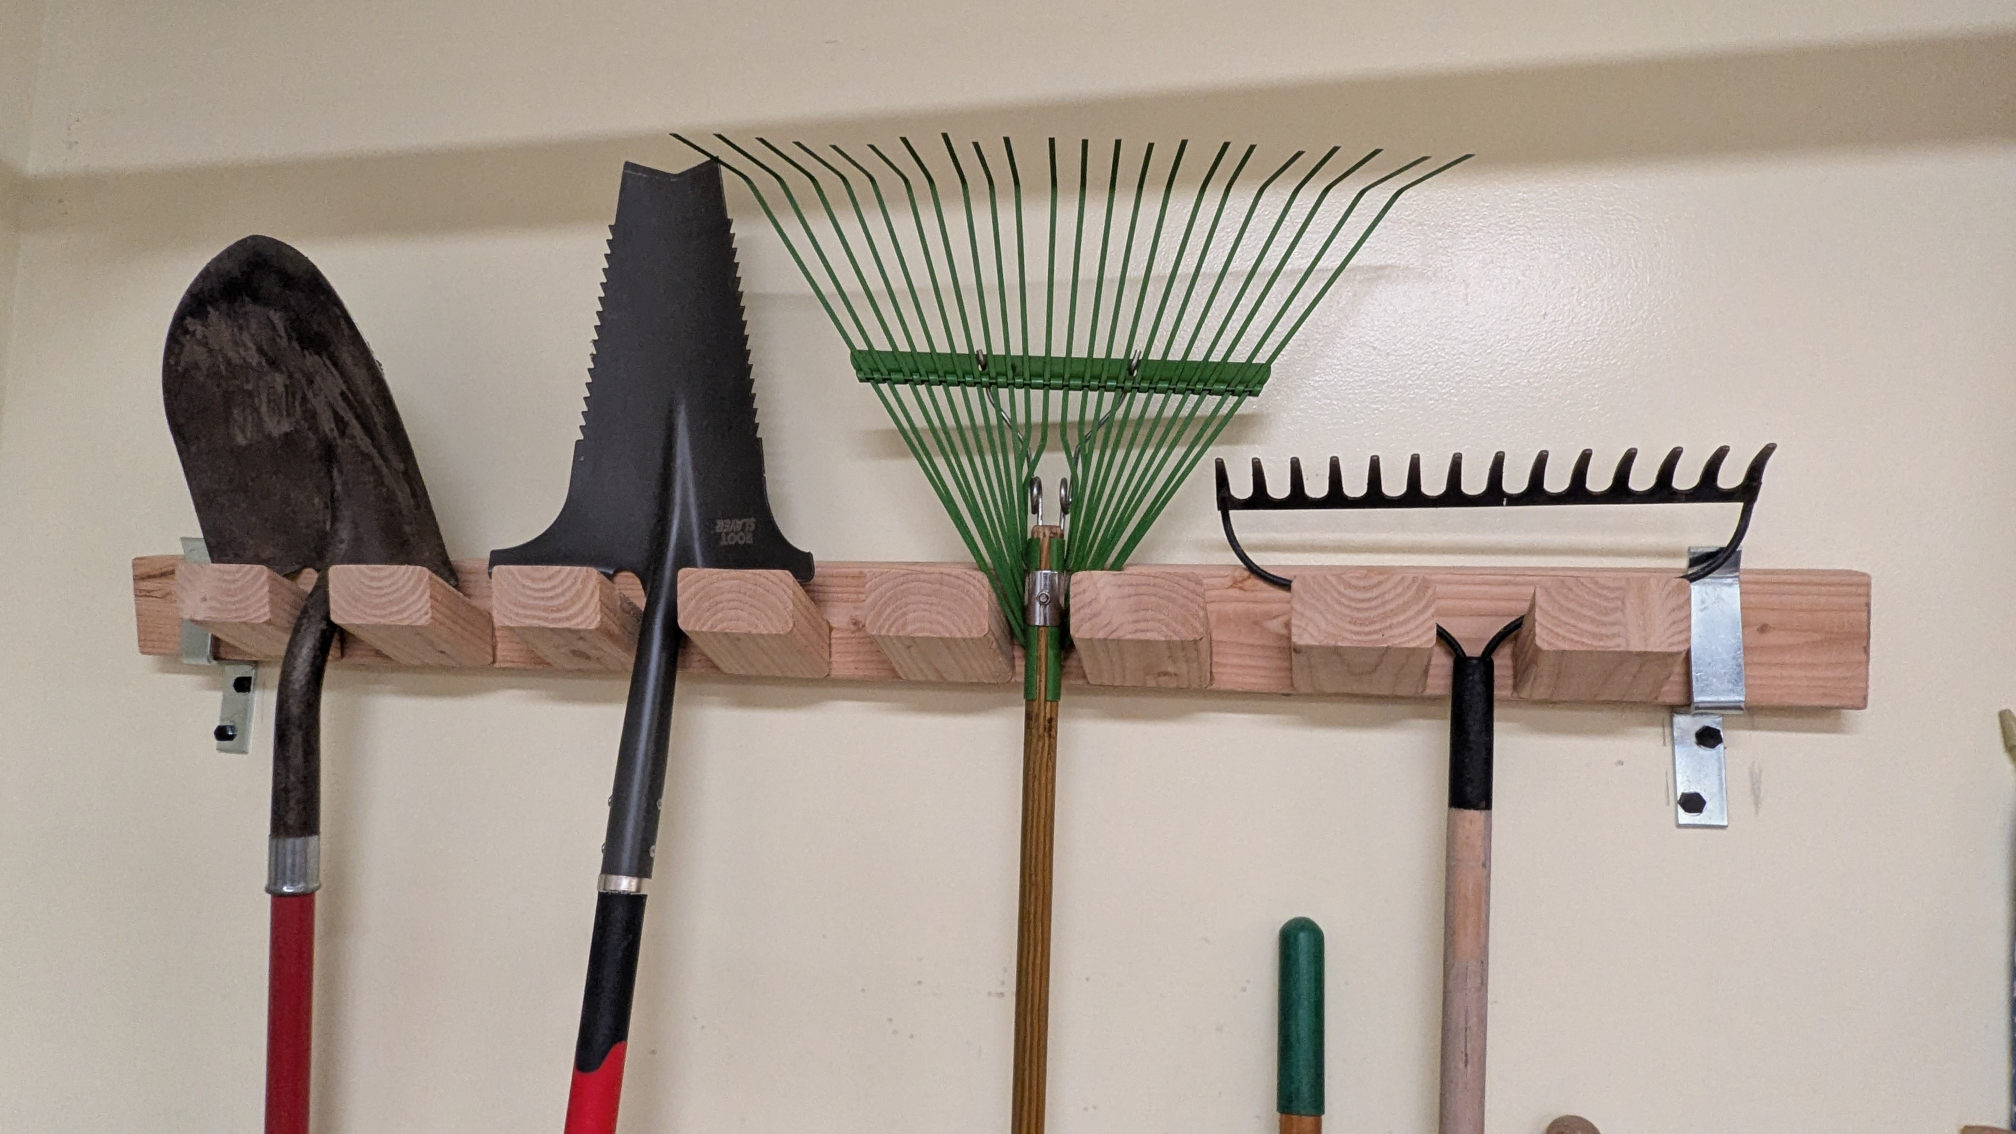
So without further ado, here is my design for a simple garden tool rack that can be made from a single 2x4.
Simple garden tool rack plans
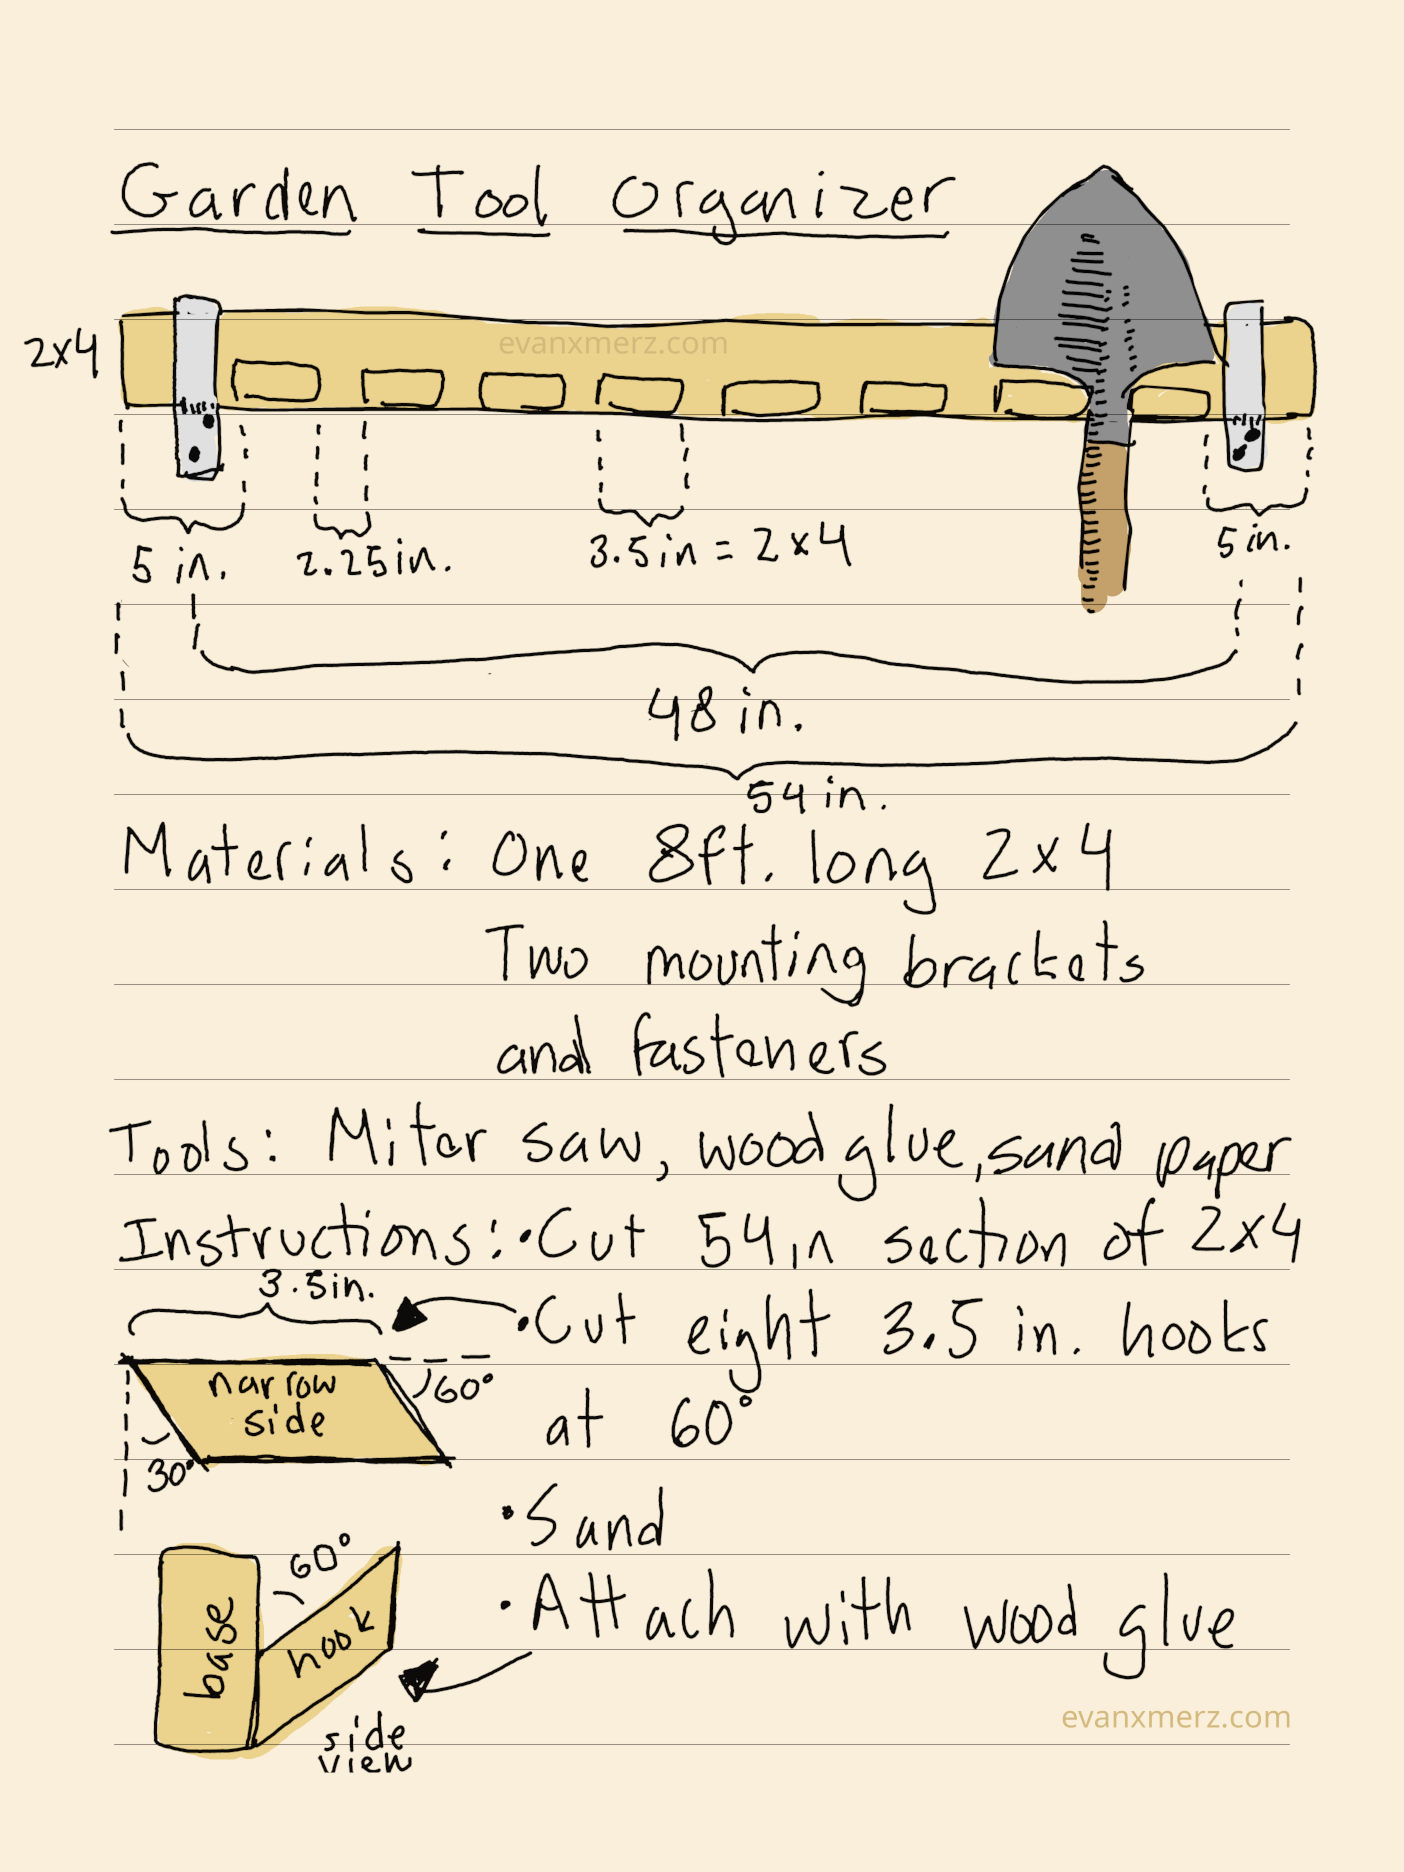
One thing to notice is that the rack itself is made from a single 2x4, however, attaching it to the wall requires some additional materials. There are many ways to attach it to the wall. I chose to use a couple of open brackets that I found at home depot.
The only tools I used to make the rack were a miter saw, a tape measure, and some wood glue. I also used a stud finder, a drill, and a wrench in order to hang it on the wall.
Steps for building a garden tool rack from a single 2x4
The first note about this is that the length I chose was based on the distance between the studs in my wall. I found two good studs that were 4 feet (48 inches) apart, so I built a rack that was 54 inches long to allow space for the brackets. If your studs are spaced differently, then you may have to tweak the length of the base.
Also notice how the hooks are spaced and angled up. I cut them at a 60 degree angle to get them to point upward slightly. I spaced them 2.25 inches apart in order to be able to hold about any garden tool and to fill the entire available space.
Finally, I assembled this using only wood glue just to keep it simple. If you have particularly heavy tools, or you want to make a sturdier rack, then you may want to secure each hook using a screw or two from the back.
Here are the steps I used:
- Make the base. Cut one length of 2x4 to 54 inches.
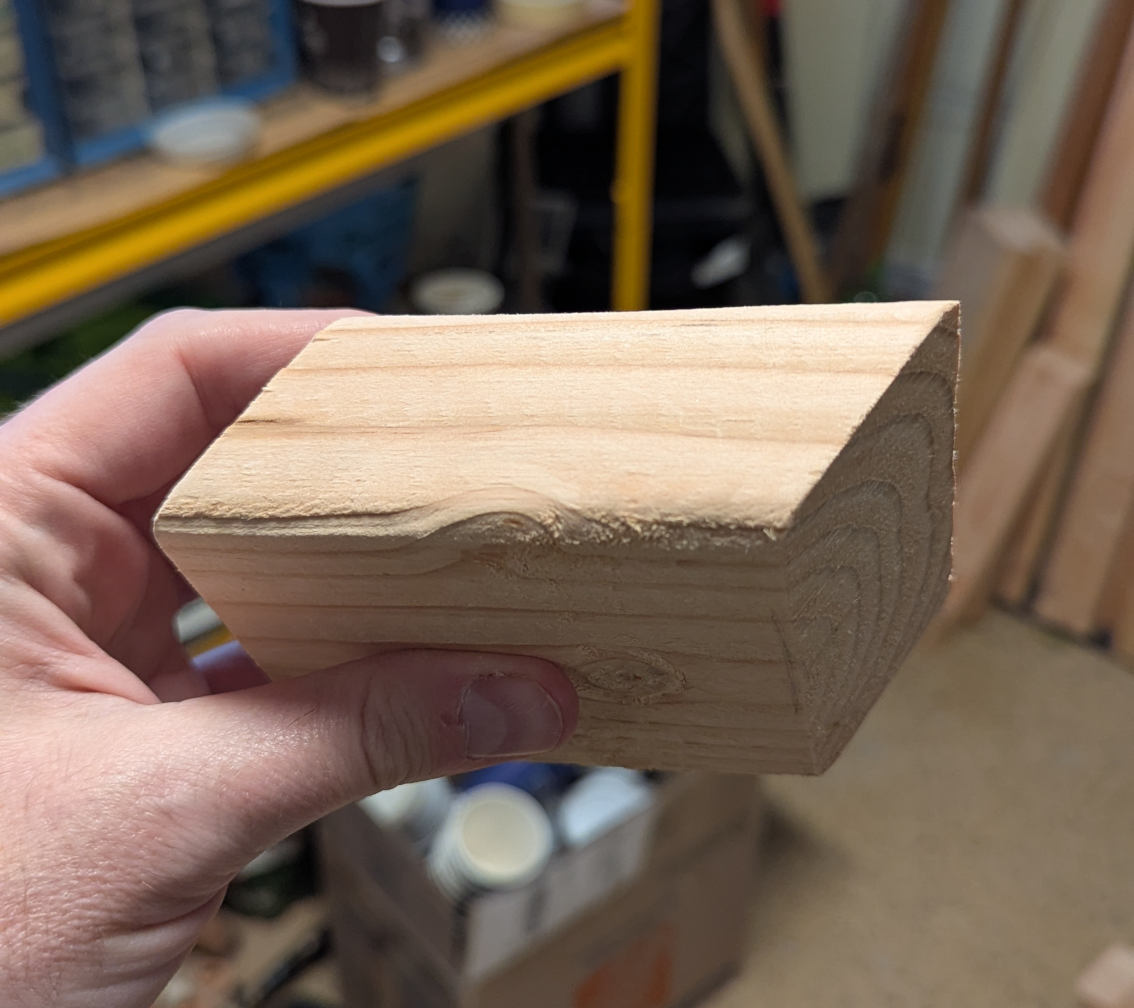
- Make the hooks. Adjust your miter saw to an angle of 60 degrees and cut eight lengths of 2x4 at 3.5 inches each.
- Sand each of the hooks.
- Measure five inches from one end of the base. Place a hook on the base at that location and trace around it so that you know where it will go.
- Measure 2.25 inches from the end of the first hook and trace another hook at that location.
- Continue until you've marked the location of each hook.
- Apply wood glue to the bottom of each hook and attach them to the base.
- Wait 24 hours for the glue to dry.
Clamping this up can be a bit tricky, so you might have to be creative with what you have. Just remember that most garden tools aren't very heavy, so it will probably work just fine even if you don't bother with clamps at all.