How does the internet work?
In this post, I'm going to give you a simple explanation of how the internet works. This is the first in a series of posts that introduce readers to modern web programming.
TLDR: It's just computers talking to each other
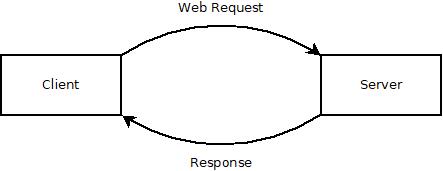
When using the internet, one device requests a piece of information that is stored on a computer connected to the internet, and that computer returns it to the requesting device. The modern web is much more complex than that, but at it's simplest level it's just computer A requesting information from computer B.
The requesting device is usually called the client. The computer that serves the request is usually called a server. So if you have to remember one thing about how the web works, just remember this:
Clients request information that is stored on servers. Servers return that information to the clients.
What is a client?
The "client" we're actually talking about is a web browser. The web browser knows how to do several things. Here's some of the things that a web browser can do.
- Build a request for information using a language, or protocol, called HTTP.
- Send that request to servers on the internet by using the operating system to access network resources.
- Parse a response to an HTTP request that sometimes includes a web page.
- Display a web page made of html, css, and javascript.
- Interpret events fired by the operating system that come from devices such as keyboards, touchscreens, and mice.
That's just a bare fraction of what the client does, but it shows that modern web browsers are technical marvels.
What is a server?
The job of the server is slightly different. The server runs a piece of software that listens snd responds to incoming web requests. Such software is called a web server and it includes Apache, Node, and nginx. When it receives a web request, it seeks the resource that corresponds to the requested information to try to fulfill the request.
In the very early days of the web, the resources were just files. So a client might make a request for "/schedule.txt" and the server would see if it had such a file, and return it if it did.
How does the client know where to find the server?
Before the client can make a request to a server, it has to know which server has the information that it is seeking. It does this by using a service called Domain Name System, or just DNS for short.
Before the web browser makes the main web request, it makes an initial request to your internet service provider, or ISP, to ask where to find that information. So let's look at how this might work when you request "google.com".
- The web browser transforms "google.com" into "http://www.google.com". The "http" stands for Hyper Text Transfer Protocol, and that's the format of the request. The "www" is just an old fashioned naming system that stands for "World Wide Web". When someone sets up a "www" subdomain, they're essentially saying that that address should be publicly available on the internet.
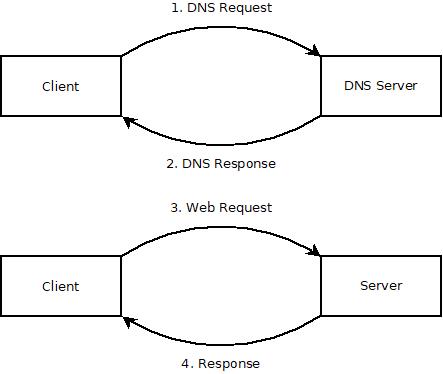
- The web browser then sends a request to your DNS to learn the address for "http://www.google.com". That request goes to a DNS server, which responds with an IP address, which is essentially like a telephone number for a computer. So the request for the address for "http://www.google.com" might return something like "123.456.78.910".
- The web browser then sends a request to the indicated IP address, "123.456.78.910". Then the server does whatever it needs to do to fulfill the request, more on this later, and returns the requested information to the client.
- The client renders the page returned from the server.
Okay, so this is getting a little bit more complex, but it still follows the same model. The web browser first sends a web request to the DNS, then it sends the web request for the specific piece of information.
What does the server actually do?
There is a lot that I am glossing over in this explanation, because I'm trying to keep it simple. I will write future posts that go into a little more detail about how the client and server work, and show how code comes into play in those processes.
But we can break the action of the web server into several steps.
- It validates the request to ensure that it's a request that it can fulfill.
- It locates the requested resource. If no resource is requested, then it seeks a default, which is usually "index.html".
- It reads the requested resource, checking to see if it needs any additional information.
- It uses attached data sources such as databases or caches to request information needed to render the resource.
- It builds the final response incorporating the requested resource as well as any data requested from data sources.
But how does it actually put all of this together? It's the job of a web programmer to tell the server how to assemble a web page that fulfills the user's request.
I want to restate that because that's why we study the web. We care about how the web works so that we can contribute to making it more useful.
It's the job of web programmers to write instructions for web servers to fulfill web requests.
Summary
In this post, I gave a concise overview of how the internet works. Here are the main takeaways.
- When using the internet, a client makes a request for a resource that is stored on a server.
- The client knows how to make web requests and render the response using html, css, and javascript.
- The server uses web software to build web pages using by filling in information from connected data sources.
- DNS servers tell web browsers where to find the web address they are seeking.
More
When I'm feeling down...
Sometimes when I'm feeling bad about myself I remember that someone spent the time to rip and upload the music I wrote for a flash game nearly two decades ago. It was for a game called Arrow of Time. And it kicked ass.
How to convert San Jose Sharks or Barracuda vouchers to tickets on Ticketmaster
I prefer to write about art, programming, and artificial intelligence on my blog, but Ticketmaster is so awful that I felt compelled to write this.
The problem is that Ticketmaster makes it nearly impossible to convert ticket vouchers into actual tickets. You might expect this to be a button on the vouchers in your inventory, but it's not there. So then you might look for some utility in your account, or settings, but there's nothing there either. So you might Google how to do it, but you'd find there's no results there either.
The fact is, Ticketmaster encourages people to buy the vouchers then makes it nearly impossible to redeem them. So I'm trying to clarify that for people. Just to set expectations properly, you should expect this to be very difficult, and it only makes sense if you realize that they don't want you to redeem your vouchers.
Steps to turn Ticketmaster vouchers into actual tickets
- Visit https://am.ticketmaster.com/sharks/ or if you are trying to convert tickets for some other team, then put them at the end of the URL. In this case, the Sharks url works for both the San Jose Sharks and the San Jose Barracuda. You might expect the "/barracuda" url to work, but you would be wrong, because Ticketmaster wants to take your money without delivering any actual service.
- Log in by clicking "Sign In" in the upper right.
- Click "Manage Your Tickets" at the bottom of the page.
- Scroll all the way down your list, then click "Select Event" next to "Barracuda Ticket Vouchers". Again, you have to imagine that they're making this as hard as possible to convert, and then it kind of makes sense. The vouchers aren't tickets, you can't use them to get in, yet they are listed with your tickets.
- Click the "Exchange" button at the top of the list.
- Select the vouchers you want to redeem then click "Continue" at the bottom.
- Click "Select Event" next to the game you want to attend.
- Select the section and seats that you want, then hover over your cart and click "Continue". This part can be extremely tricky because Ticketmaster doesn't want you to redeem your vouchers. So you have to choose seats that EXACTLY match the value of your vouchers. You can't choose cheaper or more expensive seats. Also, you can't leave one empty seat in a row (if I were a lawyer I would question this policy in particular).
- Click "Submit"
Summary
For my own sanity, I just want to summarize how stupidly difficult this is.
- You must go to a custom URL that can't be found via link or search. As far as I know, you have to be told this link by a human.
- You must find the vouchers listed with your tickets, by clicking buttons that are at many different positions on the page, appear in multiple different styles, and have wildly varying text.
- You must pick seats that exactly match the very narrow criteria under which Ticketmaster will allow you to exchange them.
It takes a minimum of 11 clicks through a very unintuitive process to convert the vouchers. In my experience, it takes closer to 20 clicks, and around 15 minutes, because finding seats that Ticketmaster will allow you to purchase is quite difficult.
If I can leave you with one piece of advice, it's this: buy tickets at the gate, or from a salesperson for season tickets, and avoid Ticketmaster altogether.
How to set up stable diffusion on Windows
In this post, I'm going to show you how you can generate images using the stable diffusion model on a Windows computer.
How to set up stable diffusion on Windows
This tutorial is based on the stable diffusion tutorial from keras.io. I started with that tutorial because it is relatively system agnostic, and because it uses optimizations that will help on my low powered Windows machine. We only need to make a few modifications to that tutorial to get everything to work on Windows.
Steps
- Install python. First, check if python is installed using the following command:
python --version
If you already have python, then you can skip this step. Otherwise, type 'python' again to trigger the Windows Store installation process.
- Install pip. You can install pip by downloading the installation script at https://bootstrap.pypa.io/get-pip.py. Run it using the following command.
python get-pip.py
- Enable long file path support. This can be done in multiple ways. I think the easiest is to run PowerShell as administrator, then run the following command:
New-ItemProperty -Path "HKLM:\SYSTEM\CurrentControlSet\Control\FileSystem" `
-Name "LongPathsEnabled" -Value 1 -PropertyType DWORD -Force
- Install dependencies. I had to manually install a few dependencies. Use the following command to install all needed dependencies.
pip install keras-cv tensorflow tensorflow_datasets matplotlib
- Save the code to a file. Save the following code into a file called whatever you want. I called mine 'stable-diffusion.py'.
import time
import keras_cv
from tensorflow import keras
import matplotlib.pyplot as plt
model = keras_cv.models.StableDiffusion(img_width=512, img_height=512)
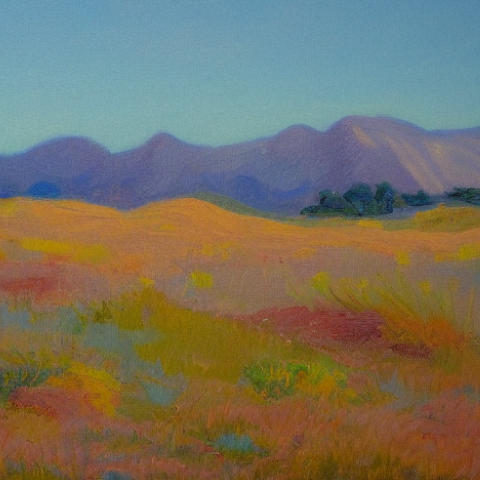
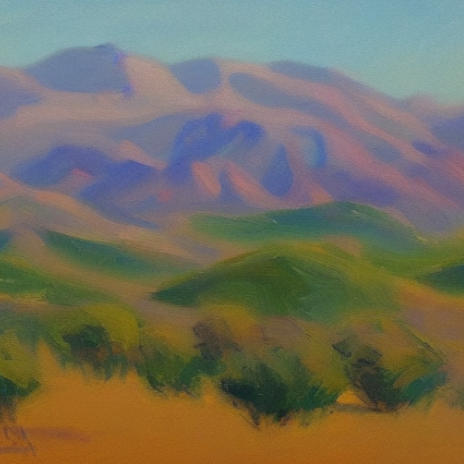
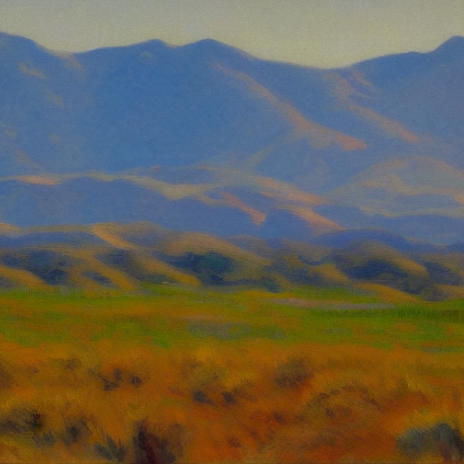
images = model.text_to_image("california impressionist landscape showing distant mountains", batch_size=1)
def plot_images(images):
plt.figure(figsize=(20, 20))
for i in range(len(images)):
ax = plt.subplot(1, len(images), i + 1)
plt.imshow(images[i])
plt.axis("off")
plot_images(images)
plt.show()
- Run the code.
python stable-diffusion.py
- Enjoy. To change the prompt, simply alter the string that is fed into 'model.text_to_image' on line 8. Here are my first images created using this method and the given prompt.
Initial Experiments with Make-a-Scene by Meta
Last week Meta announced their entry into the field of artifical intelligence image generation. Their new tool is called Make-a-Scene and it takes both an image and a line of text as prompts. It's a more collaborative tool than some of the other image generators made by other companies. A person can sketch out a rough scene as input, then use text to tell Make-a-Scene how to fill it in.
Make-a-Scene isn't yet open to the public, but as a Meta employee, I was able to get my hands on it early. In this post, I'm going to show you my first experiments with Make-a-Scene, and you can see how it compares to the other image generation tools.
As a lover of California landscapes, and a collector of the painters known as the California Impressionists, I had to start by trying to generate some California landscapes. I drew an image with a sky, a mountain, a river, and a fence. Then I gave it the prompt "an impressionist painting of california". This image shows the input along with four generated images.
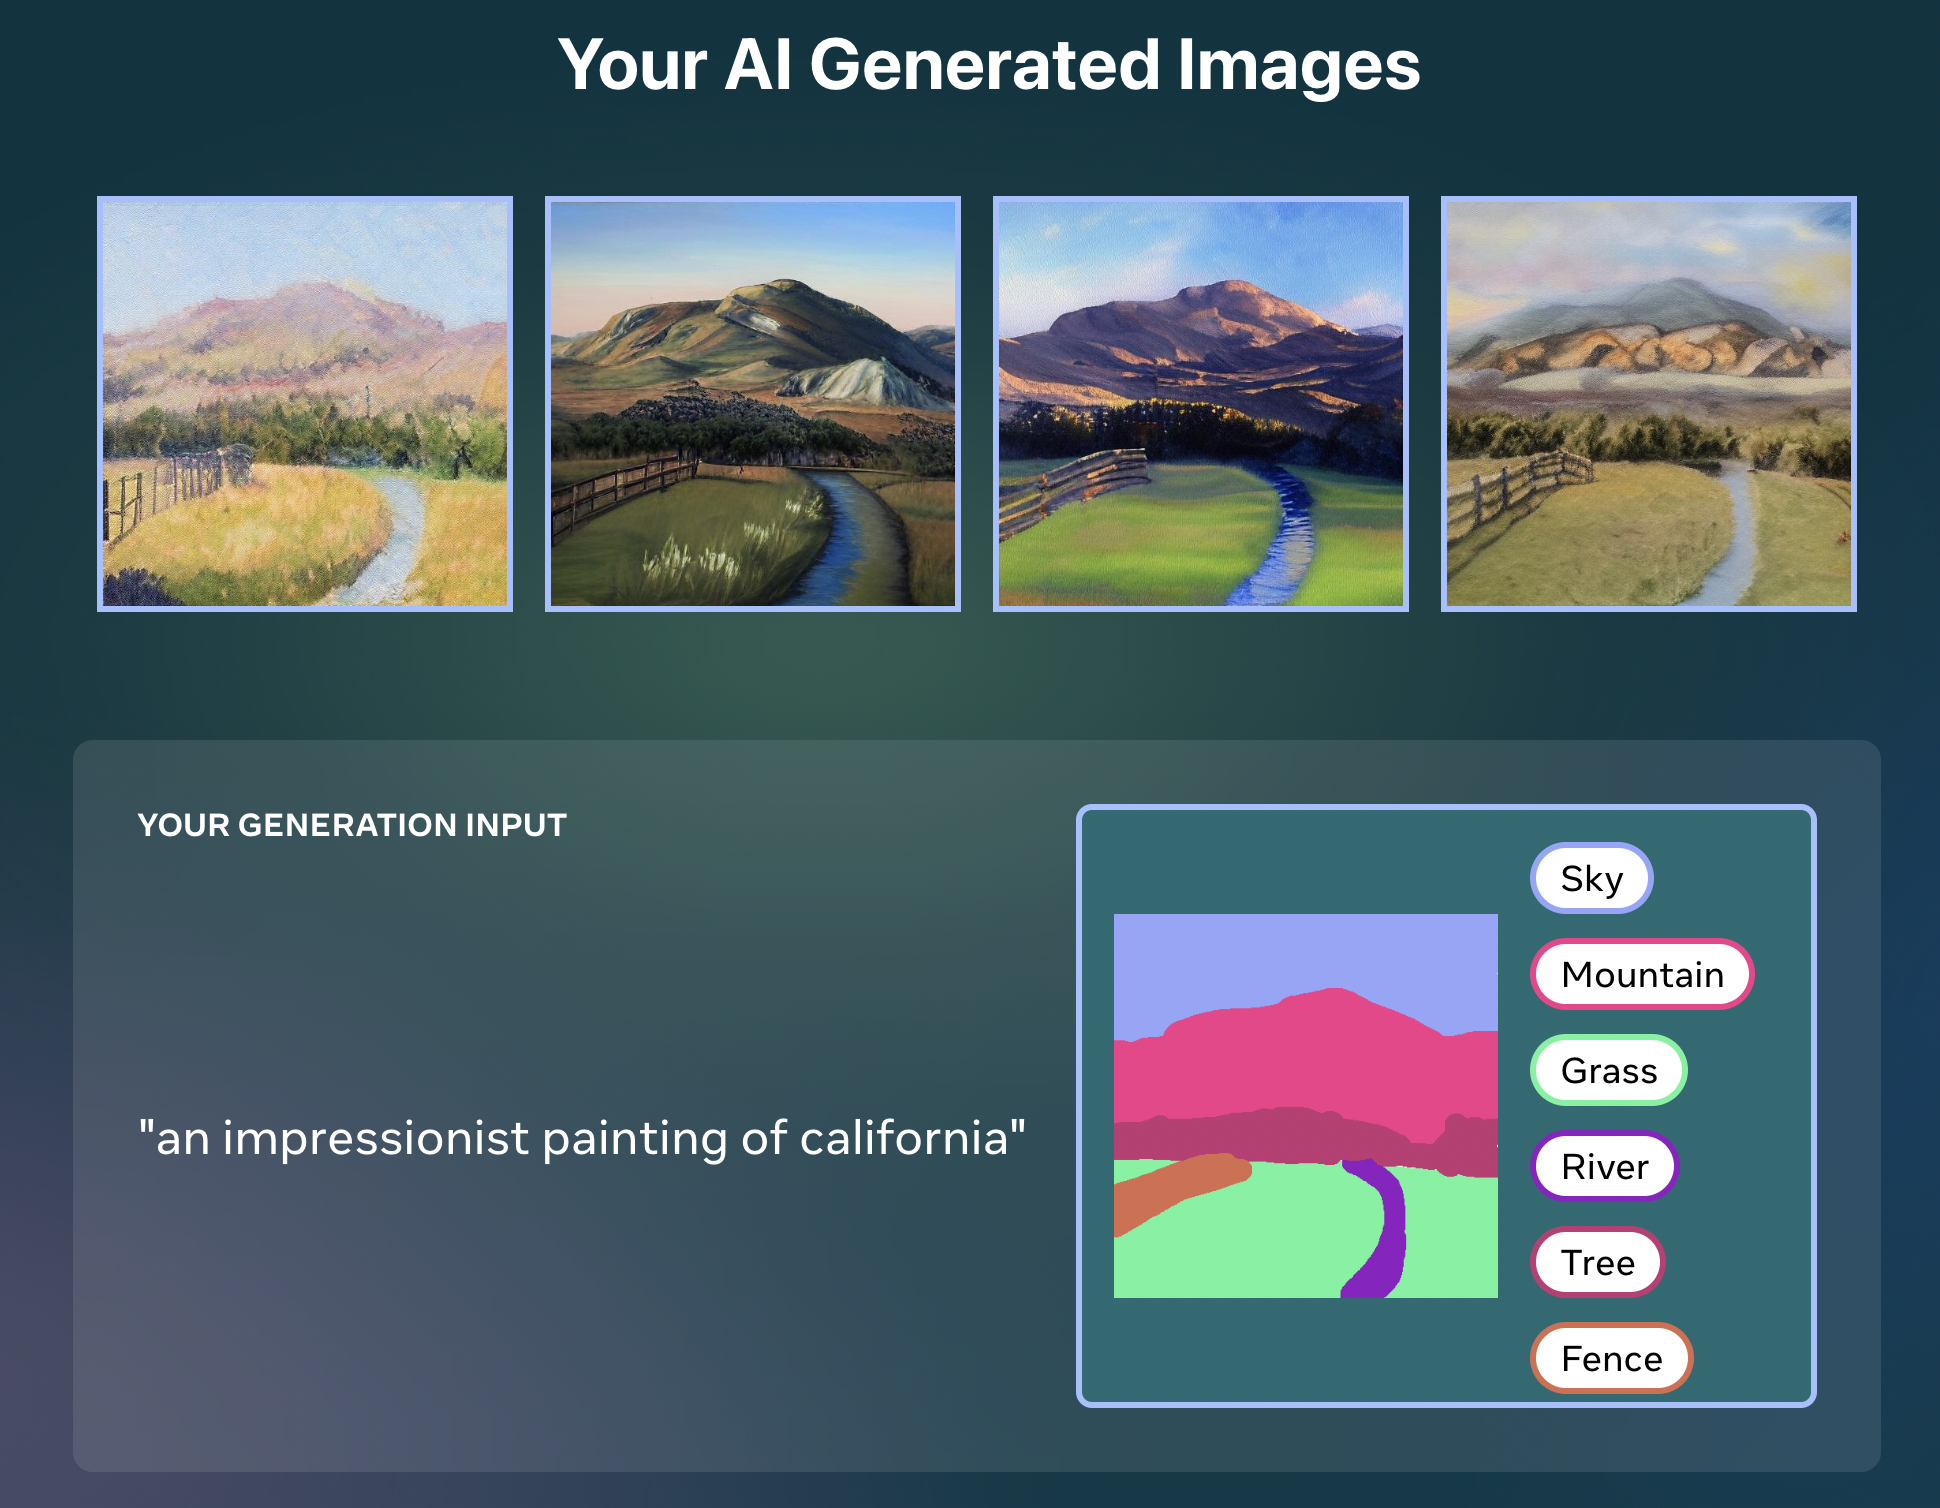
I particularly liked the first two images.


As you can see, Make-a-Scene tries to follow the image input as closely as possible, and it's able to interpret the phrase "impressionist painting" in many different ways.
Next, I fed it the much more specific prompt of "Emperor Palpatine training Anakin Skywalker". As you can see from the generated images, it struggled much more to understand both my poor drawing, and the very specific text prompt.

You can see how my drawing led the AI astray in the generated images. I included lightsabers in sections of the image labeled as "person" so Make-a-Scene added some funky looking arms onto the people. Interestingly, it didn't necessarily understand who the fictional characters were, but it knew that they were soldiers.

For my last experiment, I went back to something more generic. I though about the type of images that marketers might need. I drew a picture of a person-shaped blob holding a spoon-shaped blob, and gave it the prompt "a woman eating breakfast". The results are trippy, but interesting.
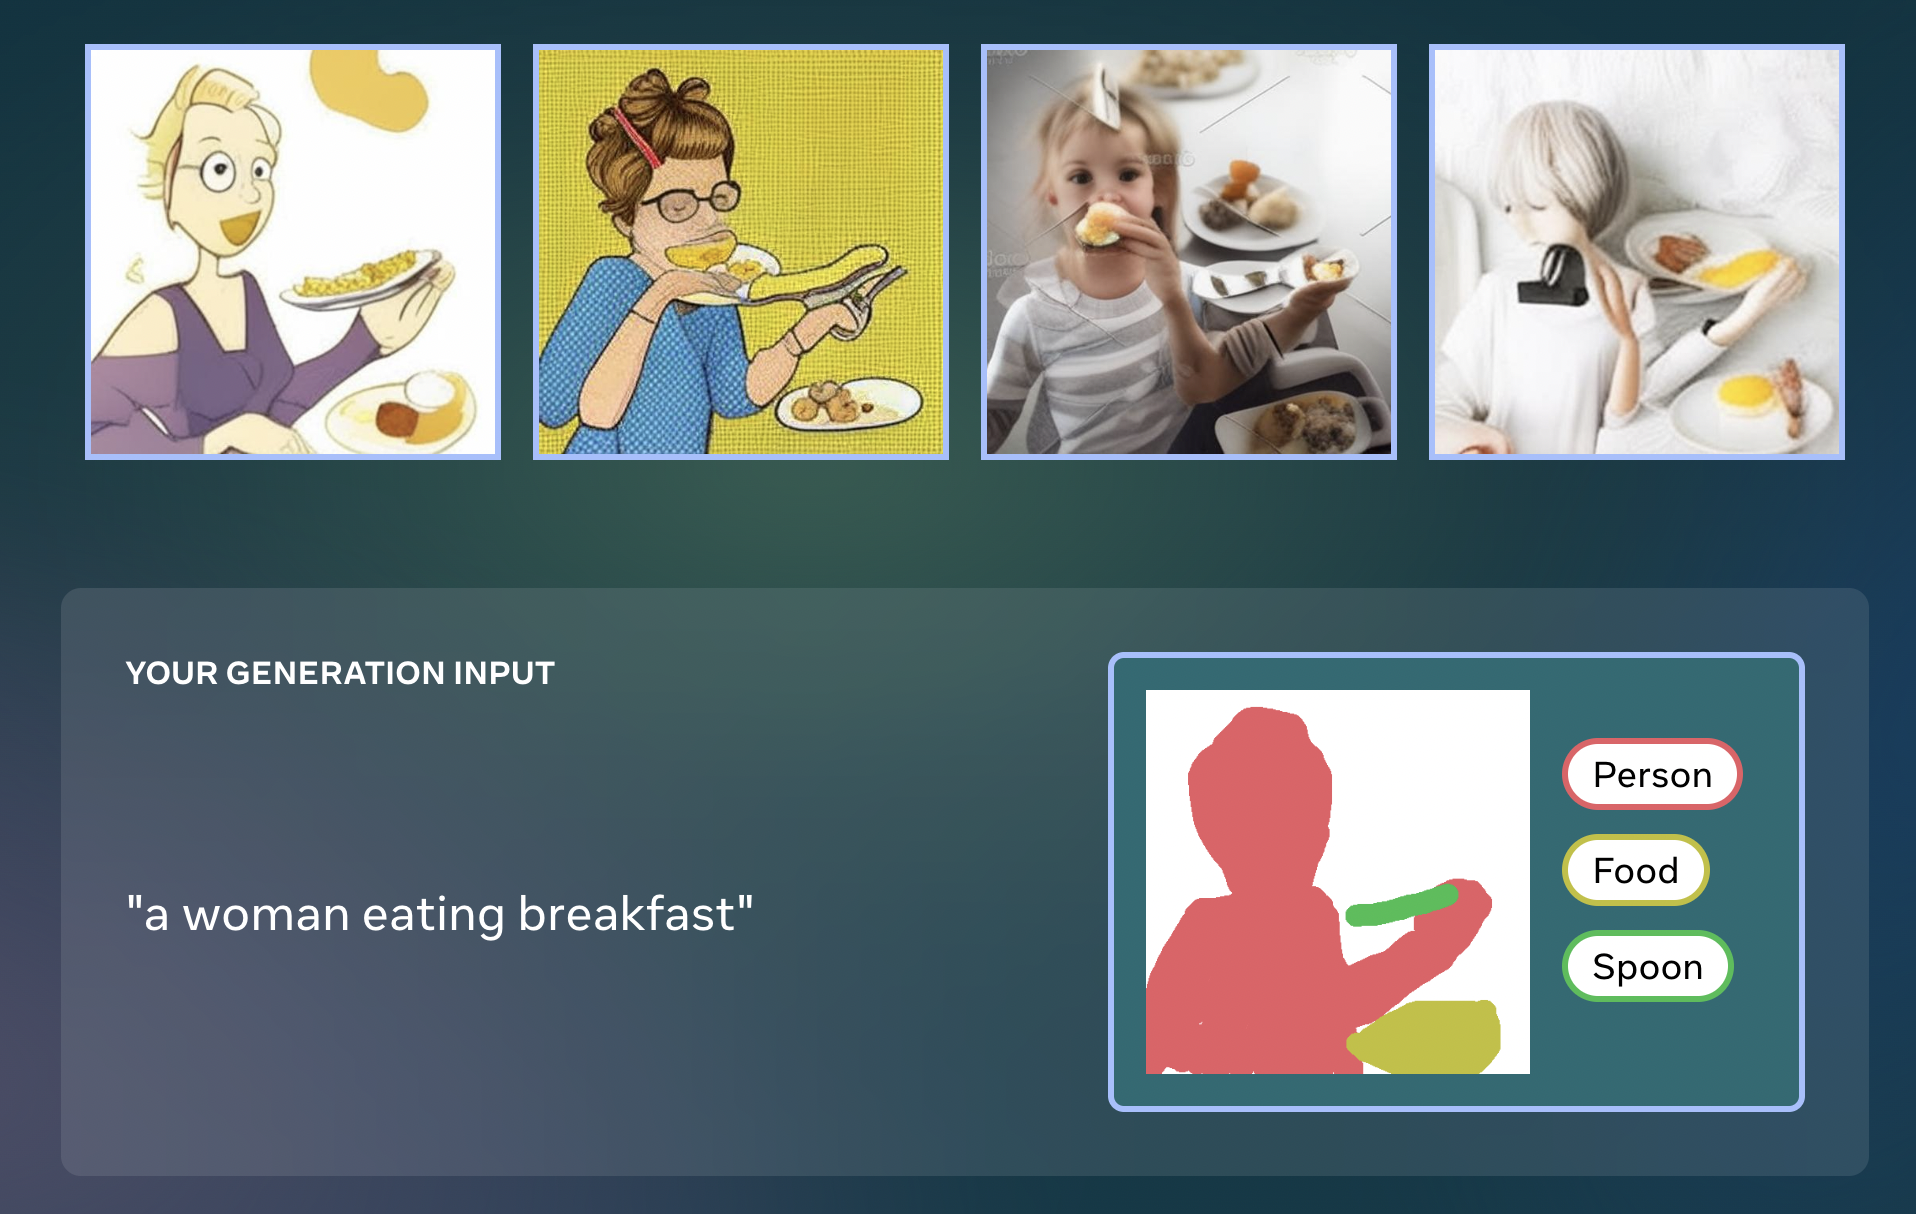
The first image it generated looks almost like usable clip art.

Overall, I think Make-a-Scene is interesting and fun. I think, even in this early state, it has some real possibility for generating art in some situations. I think it would be particularly good at creating trippy art for album covers or single artwork on music streaming sites. I also think it could be useful for brainstorming visual ideas about characters, concepts, and even fiction. I hope that Meta opens it up to the public soon.