The AI caching problem that everyone is ignoring
There is a lot of talk about AI lately, but I haven't heard much chatter about one particularly difficult problem that is facing the industry: caching.
It's not a sexy topic to discuss. It involves some esoteric technical intricacies that only web developers will understand. But caching is a big problem for AI.
Scaling traditional web services
A typical web request goes from your web browser to a web server somewhere in the world that processes your information and sends you the requested information. The requested information might be a blog post, a social media post, a video on a streaming site, or sports scores. However, in a traditional web service, many users are requesting the same thing. In other words the server is giving the exact same sports scores to every user who requests them.
Because users are requesting the same thing, the web service can optimize their system by caching that information. This means storing it in a way that is much easier and more efficient to access. One server running a caching system like Redis might cache millions of different requests and serve each response in a tiny fraction of a second. Those requests never hit the main server, which is much more expensive to run.
This is how traditional web services scale. If performant caching didn't work, then all web services would be much slower and much more expensive.

AI requests can't be cached
The fundamental problem facing everyone in the AI race is that requests to AI can't be cached in the same way. Even if users are making very similar requests, they might not want exactly the same response. In other words, when user A tries to generate a cartoon image of a cat, they probably want one that looks like their cat. When user B makes the same request, they probably don't want the same image as user A.
Everyone knows that AI involves some very complex math that uses Generative Adverserial Networks. These networks, even when not in training mode, can't be cached like traditional web requests. They need to be run on actual servers.
This is what has resulted in the big debate about server resources. AI inherently requires more computing power than traditional web services.
The big problem is profitability
The computing issue on its own is a big problem, but if you focus on it, then you miss the larger problem.
AI can't be profitable if it can't be cached.
If traditional web services couldn't be cached, then they would have a hard time being profitable. In other words, if the companies had to pay for many more servers to run their sites, then users would have to pay a monthly fee to use their services. If everyone had to pay a monthly fee to use social media, would they do so? The number of users would go way down. What about sites like Craigslist or YouTube or Yelp? Would those be able to exist if every user had to pay a monthly fee?
AI services might be free for now, and that's nice for regular people, but the services aren't going to last if they aren't making money.
And they won't make money unless they can solve the caching problem.
So the big problem facing the AI industry today is that we have a bunch of huge companies racing to own a field that, so far, is a money loser. It probably can't be profitable without a significant innovation in hardware or software.
Potential solutions to the AI caching problem
There are several potential solutions for this problem.
A hardware breakthrough could solve the issue. If someone found a way to make hardware that can execute AI models extremely efficiently, then the requests wouldn't need to be cached.
A software breakthrough could also solve the issue. If someone invented a way to break down AI requests into smaller pieces that could be cached, then that would make the services potentially scalable.
But I have a lot of experience in web development and in artificial intelligence. I'm not in academia (at the moment), but I'm familiar enough with the complexities of these issues to know that these are extremely difficult problems.
In fact, there are some problems in computing that we know are unsolvable, or at least not solvable without the computing power of the entire universe. The caching problem in AI looks a lot like one of these problems that can't be solved efficiently.
Of course, the counterargument to this is the existence of the human brain. The human brain somehow runs these calculations very efficiently. It's existence implies that there must be some way to optimize these queries.
I'm looking forward to seeing how the industry takes on this problem.
Plans for an easy to build string trellis
I wanted to build a trellis for my peas this year, so I searched the internet and was immediately overwhelmed with AI slop. There were dozens of pages written by AI featuring trellises with impossible geometry and instructions that say "assemble your materials then follow the instructions to complete the trellis."
So I had to take what I could find and design something from scratch.
I'm not an expert woodworker, so these plans aren't a work of genius. However, I think they're a good starting point inasmuch as they are actual working plans that weren't generated by AI. If you are a more experienced woodworker and you make an improved version of this trellis, then share it with me on social media.
Here's what the final product looks like.
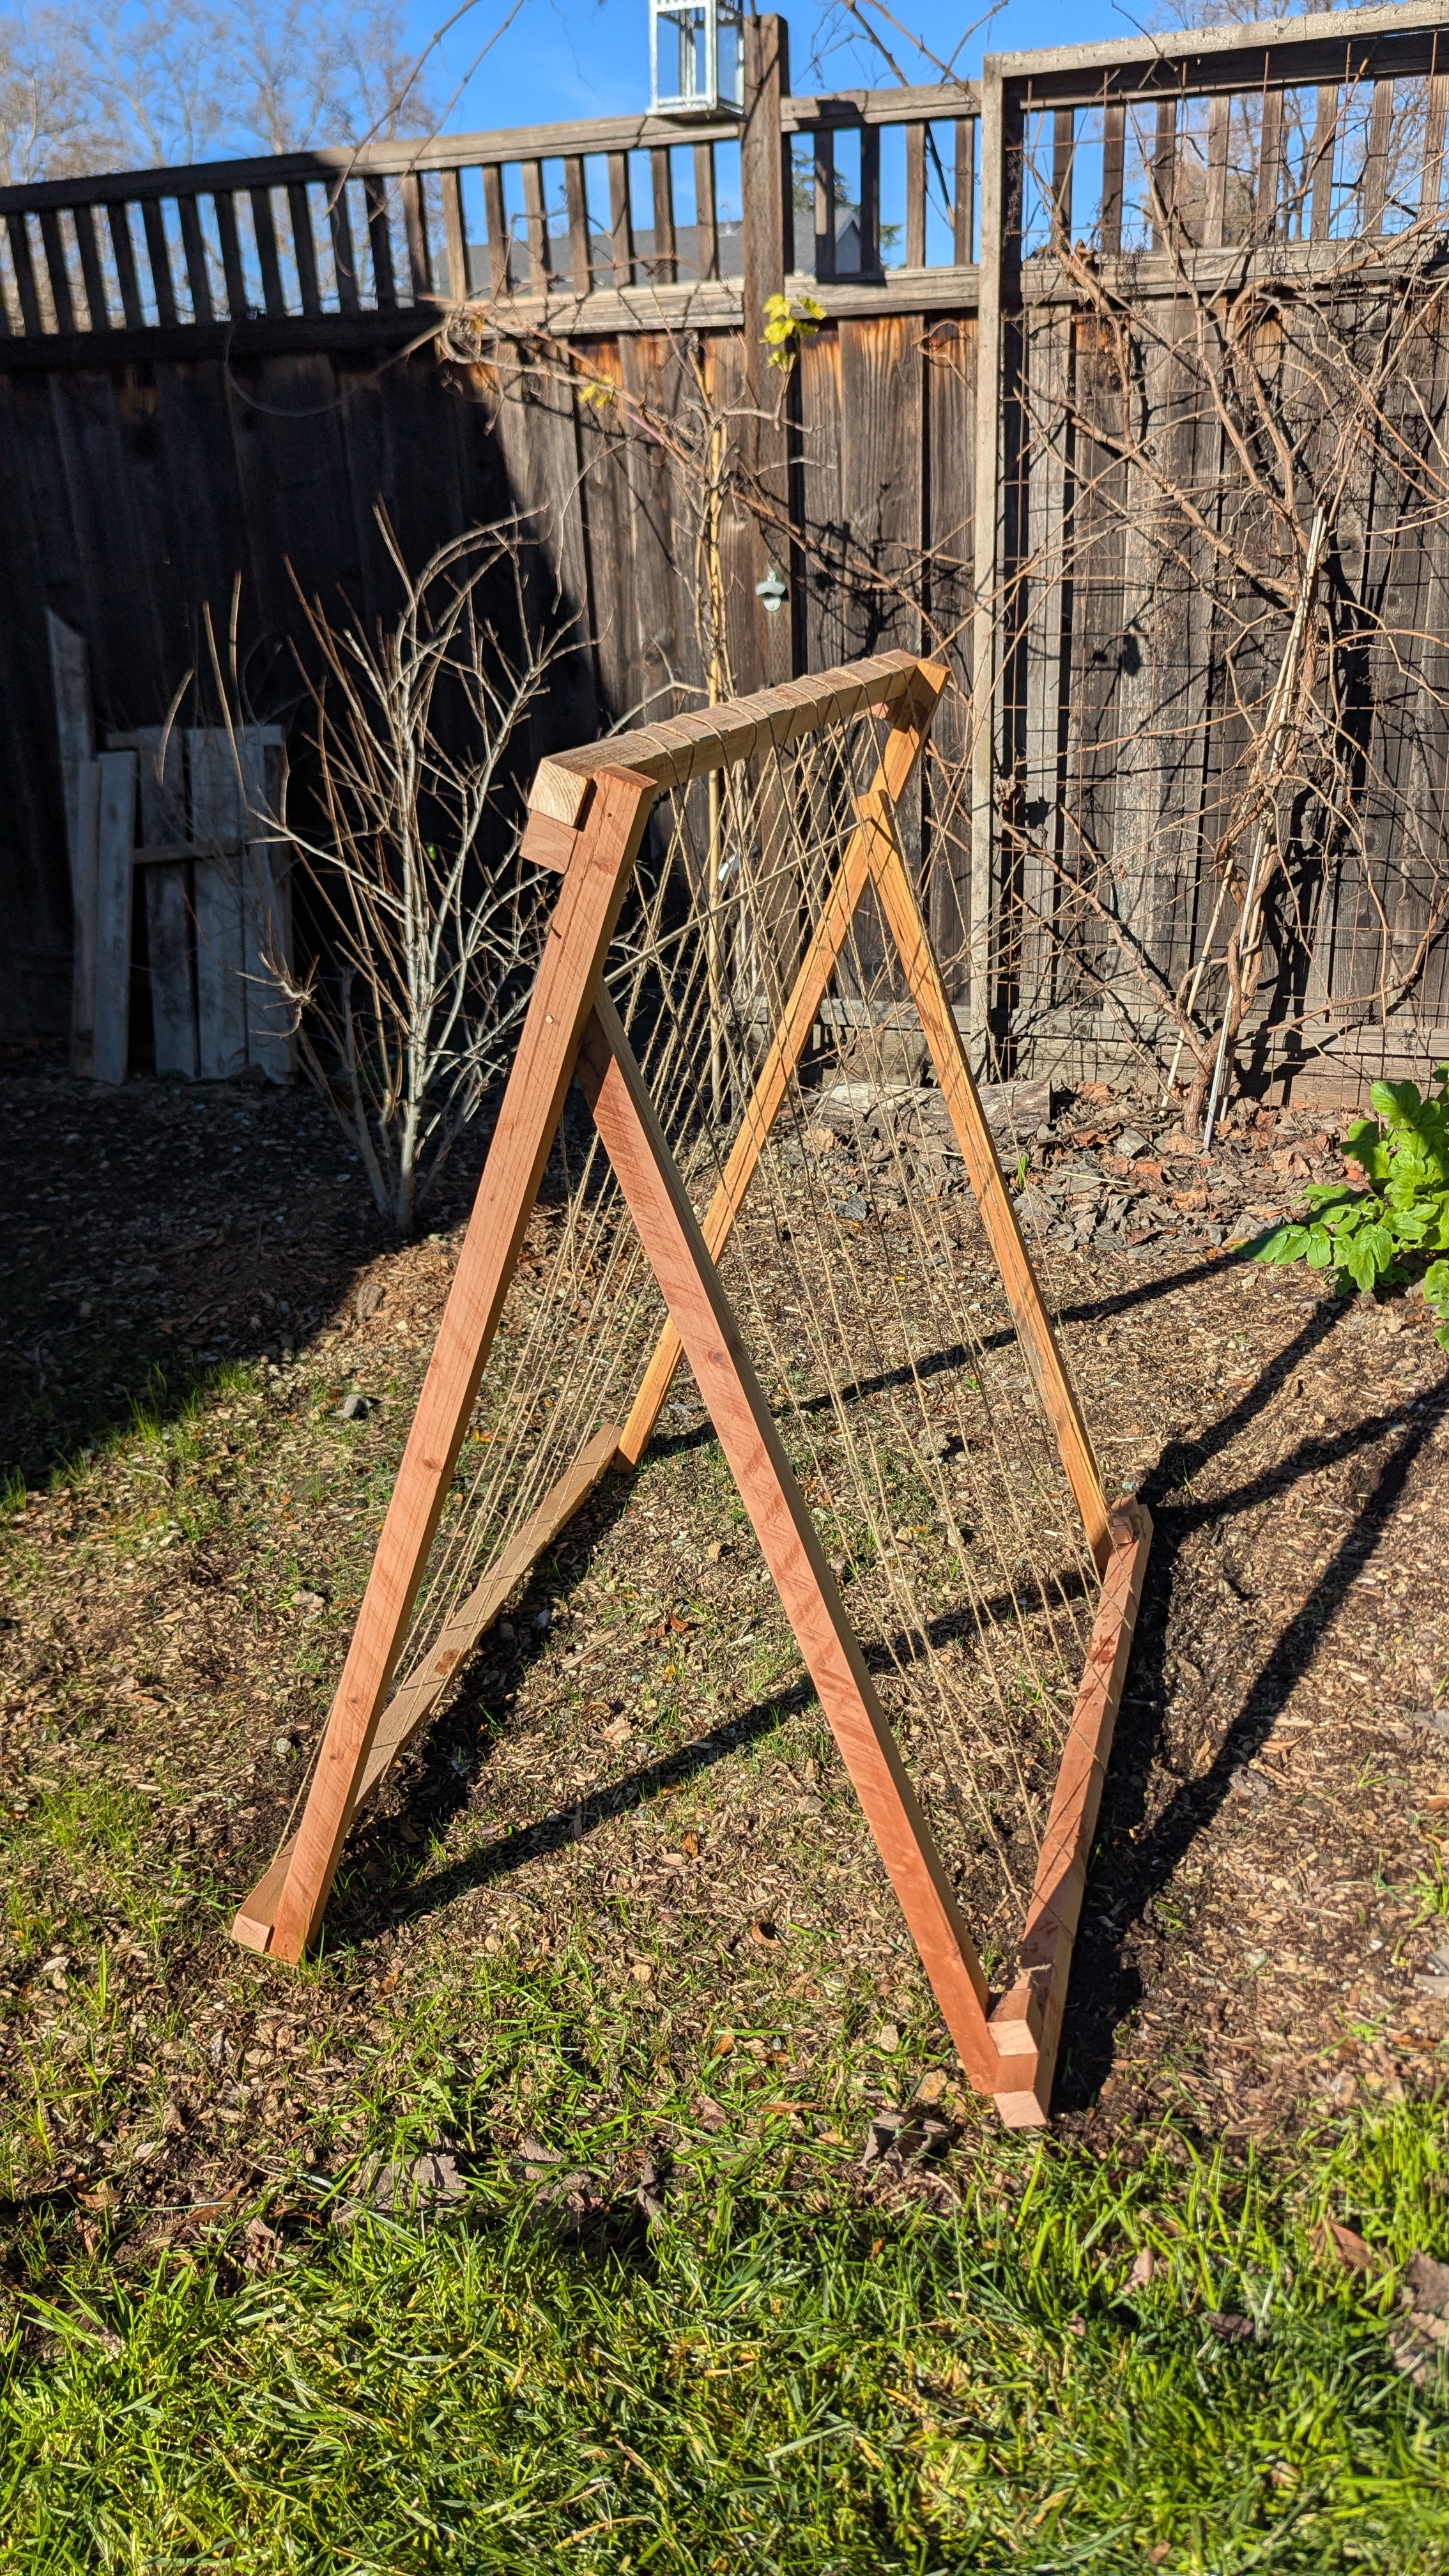
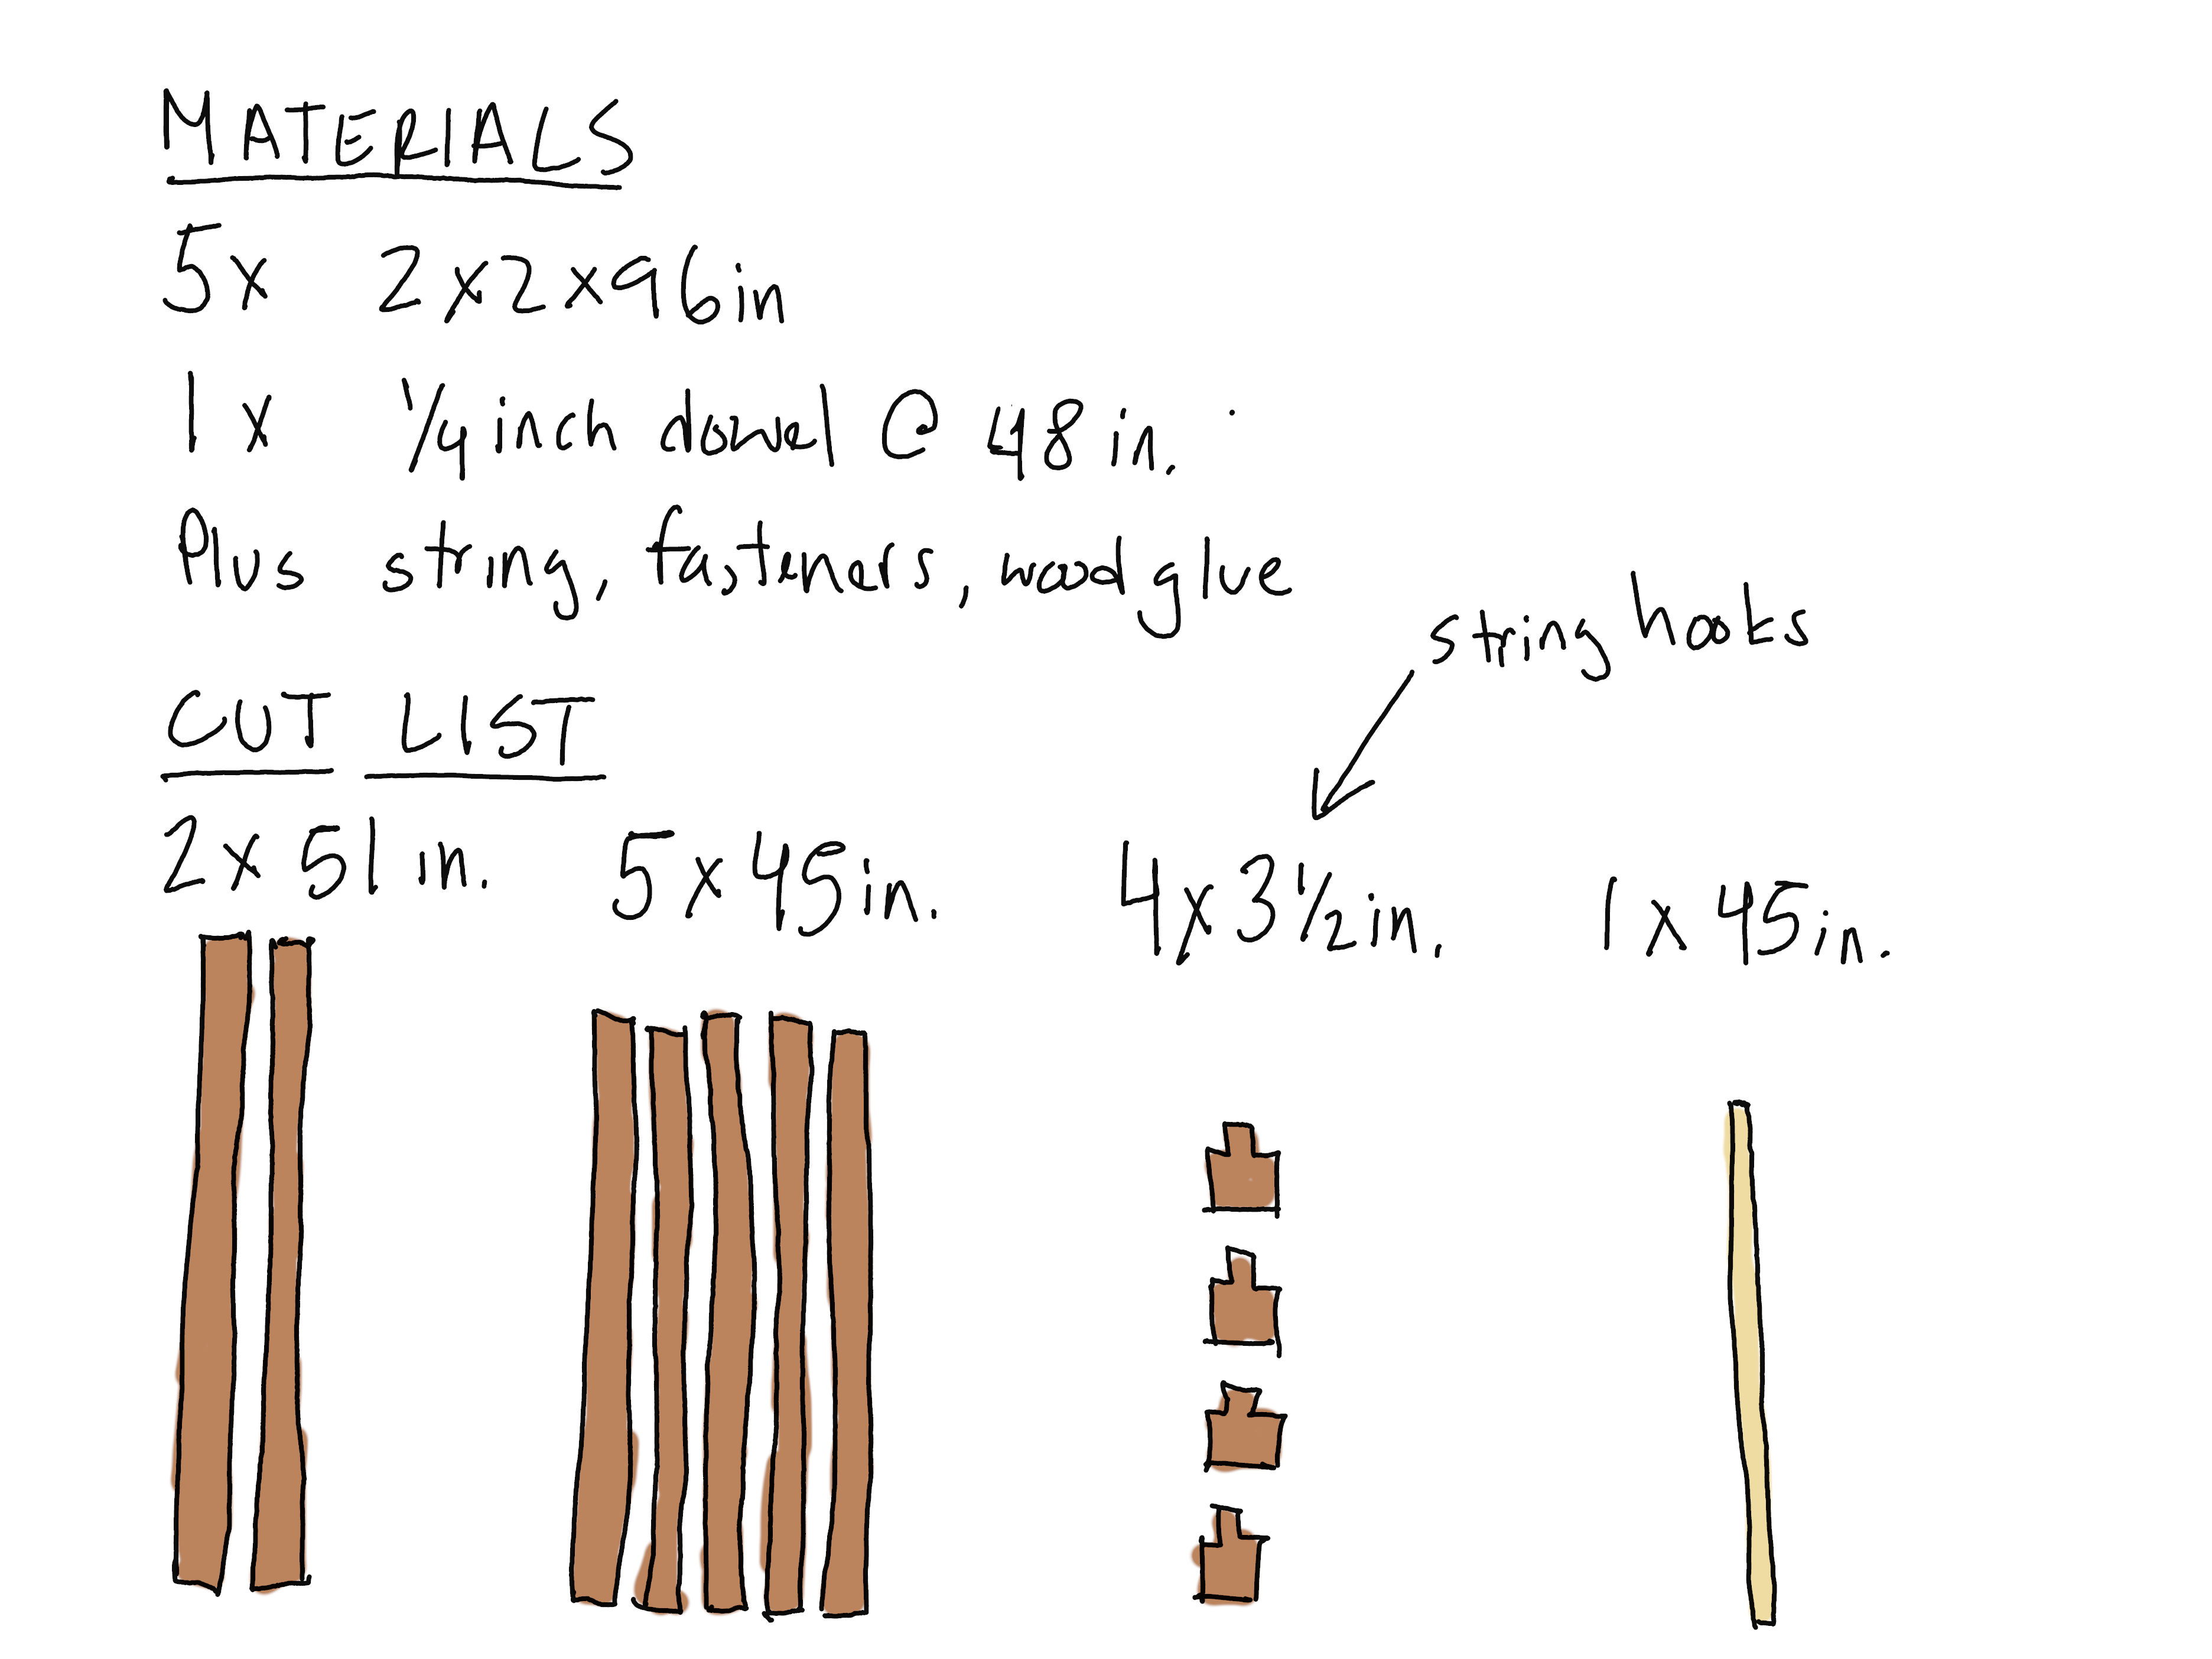
Here's how to build it. Click through each of the steps in the tabs to see my hand drawn illustrations.

For materials, I used eight foot long redwood 2x2s from Home Depot. These cost around $6 near me. Since I needed five 2x2s, the lumber cost around $30. I used a four foot long quarter inch pine dowel which cost around $1. I used screws and glue that I had lying around.
I used screws to attach the legs and crossbars, however, this results in a frame that is unstable. So I had to glue the string hooks in place in order to prevent it from folding up horizontally.
For tools, I used my table saw, a drill with 1/4 inch and 3/8 inch bits, a tape measure, a screwdriver, and a pair of scissors to cut the twine.
You could probably build this more cheaply by buying three 2x4s, and ripping them in half. I only used redwood 2x2s because I had them leftover from a previous project.
The only difficult part about cutting this project is making the string hooks. I cut small tenons to tie the strings off, but you could easily just put notches into the 3.5 inch pieces and wrap the strings around them.
If you build this trellis, or a version of it, then share it with me on social media. I'd love to see it!
My garden goals for 2026
It's January 2026. Everyone is making resolutions, and I'm not going to be left out.
In fact, I think there's value in thinking about what you want to accomplish in a given year and writing it down. Setting goals or making resolutions is a valuable way of organizing your thoughts and ensuring you are staying focused on the right things.
So here we go.
1. Take better care of my tools
After a few years of gardening, and a certification as a UC Master Gardener, I've acquired some decent gardening tools. Not all of them are expensive, but all of them are functional. Yet, my care for them can be somewhat lackadaisical. I rarely sharpen blades or remove rust. In fact, I'm ashamed to admit that I often put my tools away muddy, wet, or covered in grass.
Here's a picture from this morning when I left out my clippers overnight.
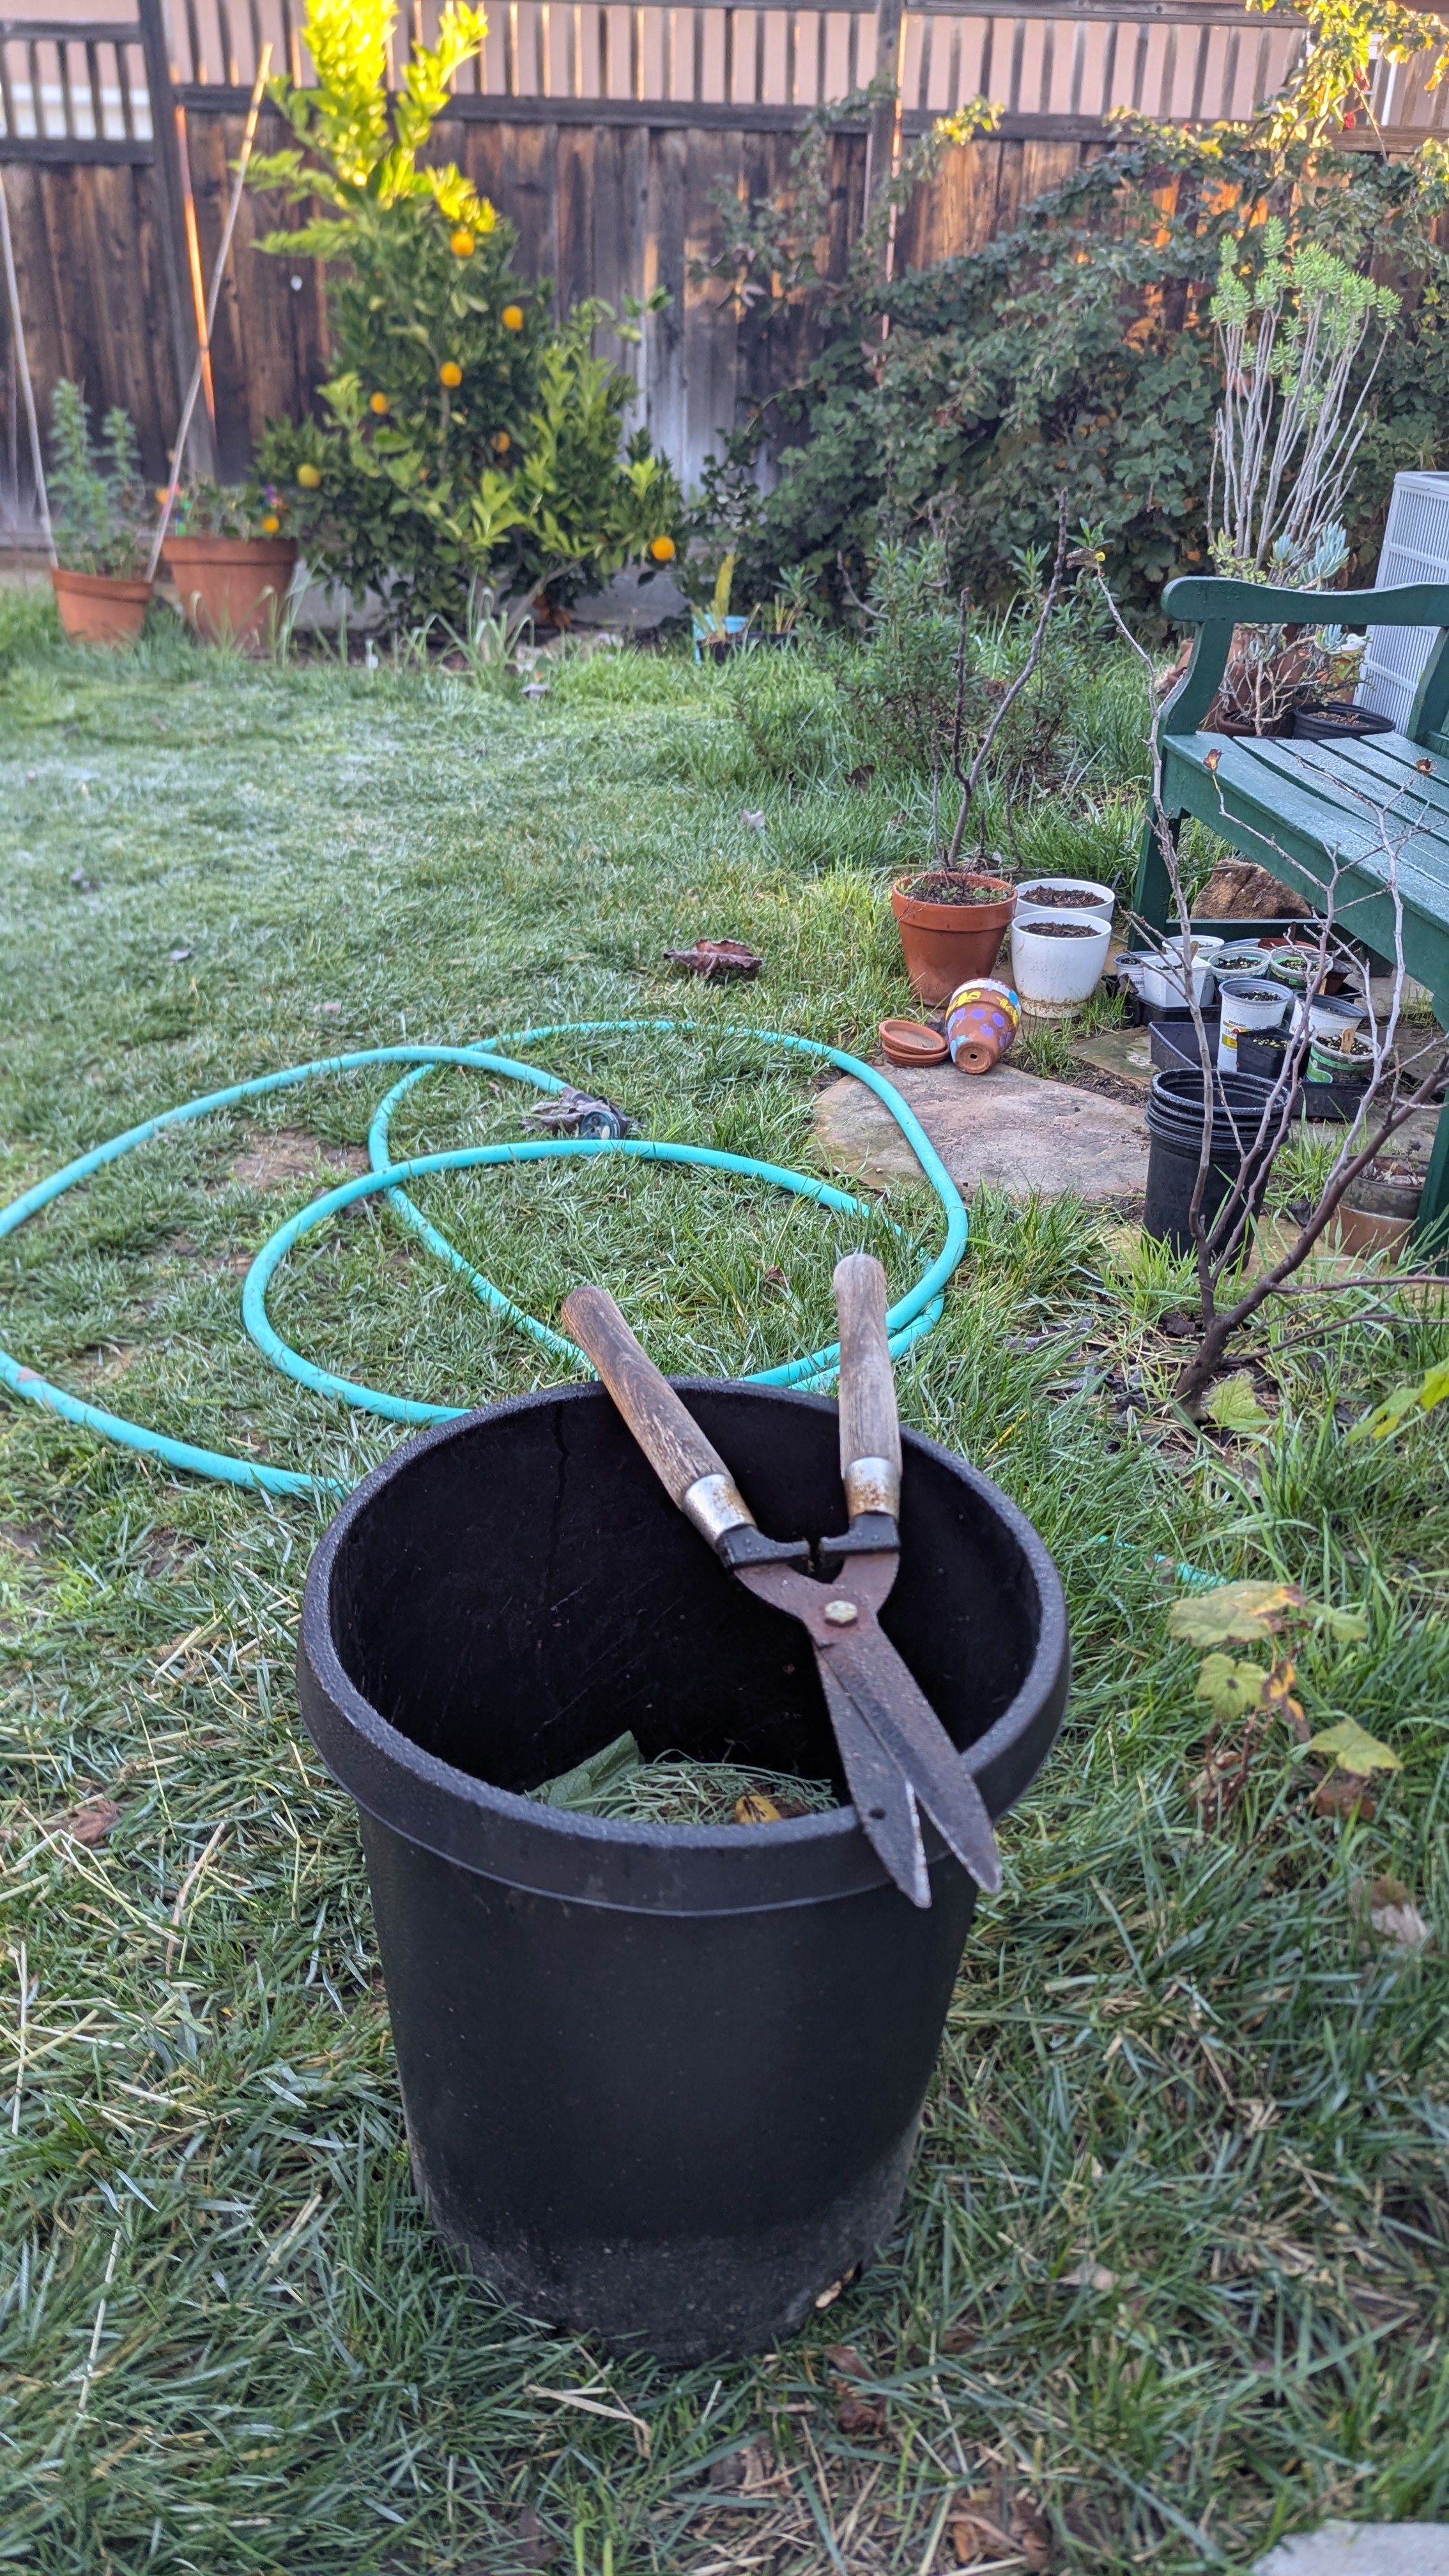
In 2026 I want to do better by my tools. I want to remove the rust, and I want to sharpen the blades. But most importantly, I want to keep my tools dry and clean.
2. Grow pole beans for the first time
Every year I try to grow something new. Last year I grew eggplant for the first time. It wasn't a glowing success. This year I want to grow pole beans.
Pole beans are part of why I became interested in gardening in the first place. I remember playing catch in the summer in my grandfather's backyard, and just pulling all the string beans off his trellis and eating them while we played. They were delicious, and probably the first vegetables that I was ever excited to eat. The memory of those beans motivated me to tend my own garden, yet I've only ever grown bush beans.
In 2026 I will try to grow pole beans for the first time.
3. Harvest a significant amount of fruit from fruit trees
Currently I have six fruit trees in my yard. One strawberry fruit tree, one persimmon, one valencia orange, two figs, and one pomegranate. I've harvested fruit off every one except the pomegranate.
But I've never harvested much fruit off any of them.
This year most of those trees will be mature enough to produce. I'd like to get a good harvest off of at least one of them.
4. Build more thoughtful garden structures
I have been trying to teach myself more DIY skills that are useful in the garden. Lately I've been honing my skills working wood. I want to be able to build any garden structure that I want in a form that fits my purpose. I mostly want to use wood, but I want to stretch myself to use whatever material is most appropriate for a given design.
I started the year off strong by building a collapsible string trellis. This trellis will help me grow peas and pole beans.
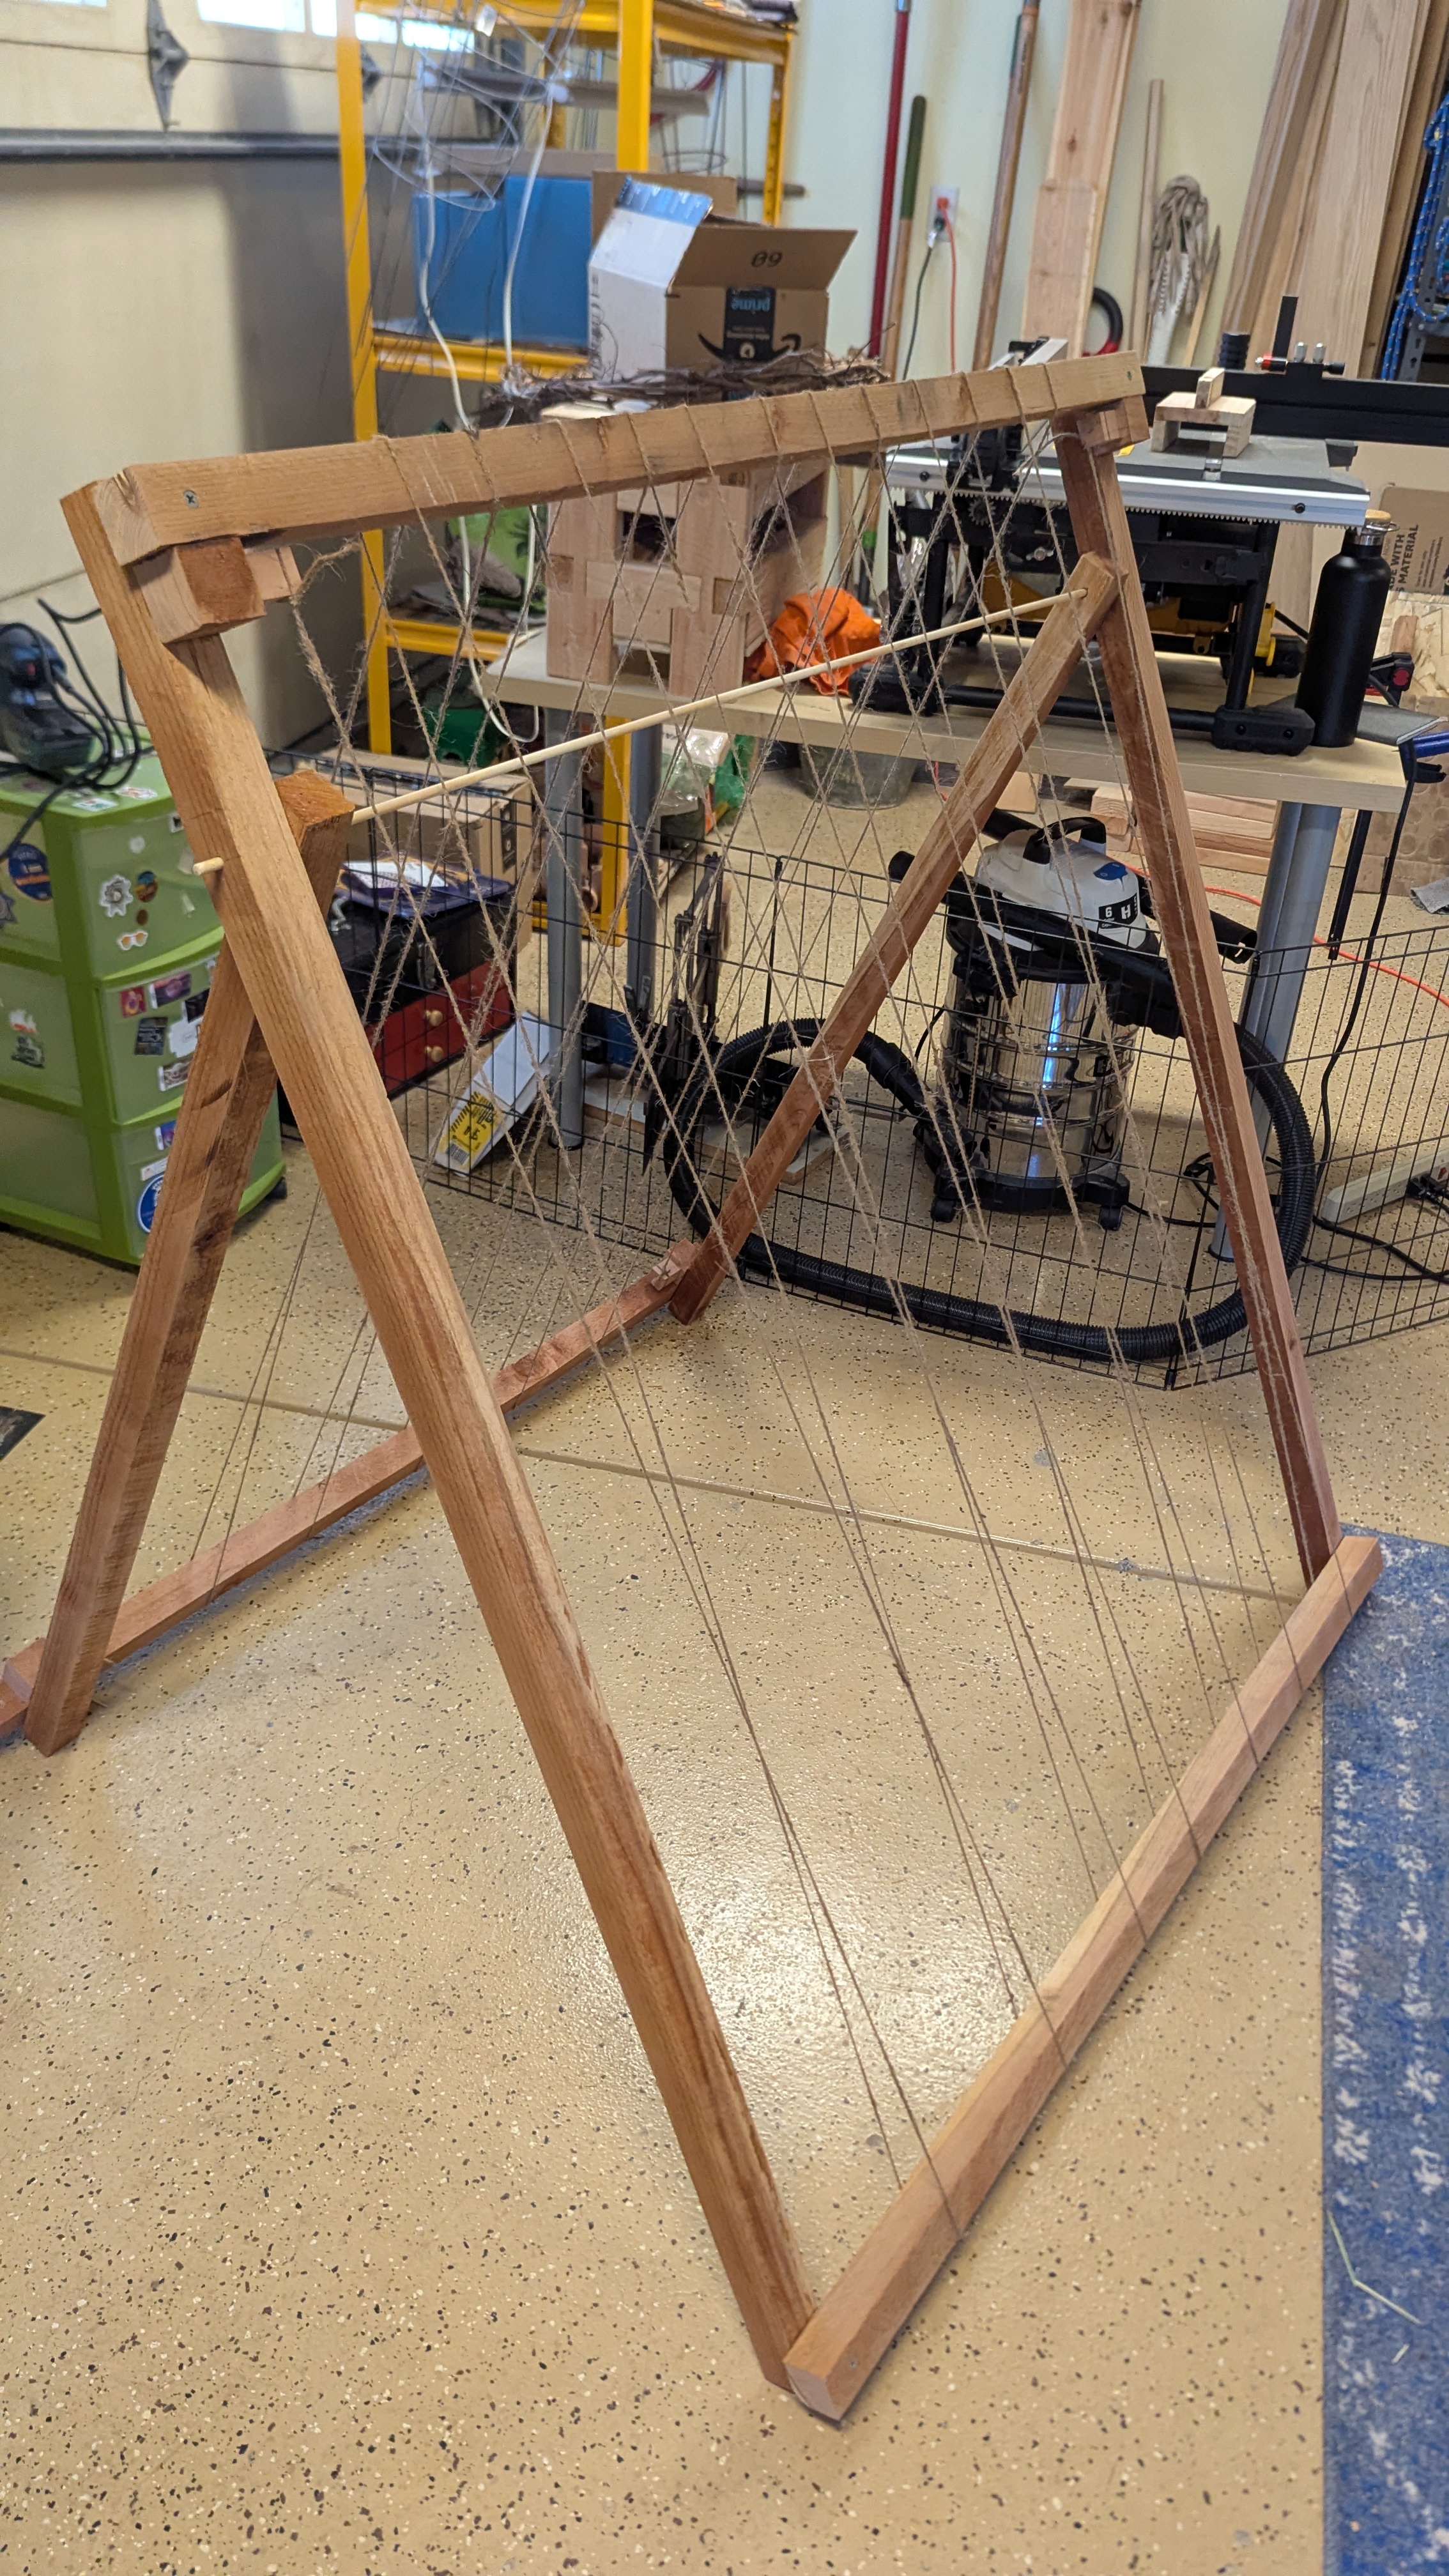
I would also like to refine my low 1 meter square garden bed design, and perhaps make a more elaborate trellis for the grapes I grow on my driveway.
5. Be better at sharing my work
Finally, I want to be better about sharing my work.
I do lots of interesting work in my garden. When the time comes that I want to leave tech, I want to have the option of doing something with plants. To make that possible I need to put myself out there. I need to grow my gardening skills, yes, but I also need to show people my gardening skills.
This post is part of that effort, and I've also been trying to increase my following on facebook via my page Evan's California Garden. I honestly don't know where any of this is going, but I'm having fun with it and I hope to get better at it.
How to make a garden tool rack from one 2x4
I recently noticed that my garage was getting a bit messy. I needed a way to hang some of my garden tools on the wall to keep them out of the way when not in use. I also wanted to make something from scratch in order to keep learning the basics of wood working that are useful for gardeners.
So I searched the internet for a simple garden tool rack and I found a few good ideas, but none that I really loved. They all looked a bit cheap or they required a lot of lumber.
I've seen the price of lumber, so I wanted to keep this build small. In fact, I wanted to build the entire thing out of a single eight foot long 2x4.
I scratched out a design, built it in one day, and I thought the result was good enough to share.
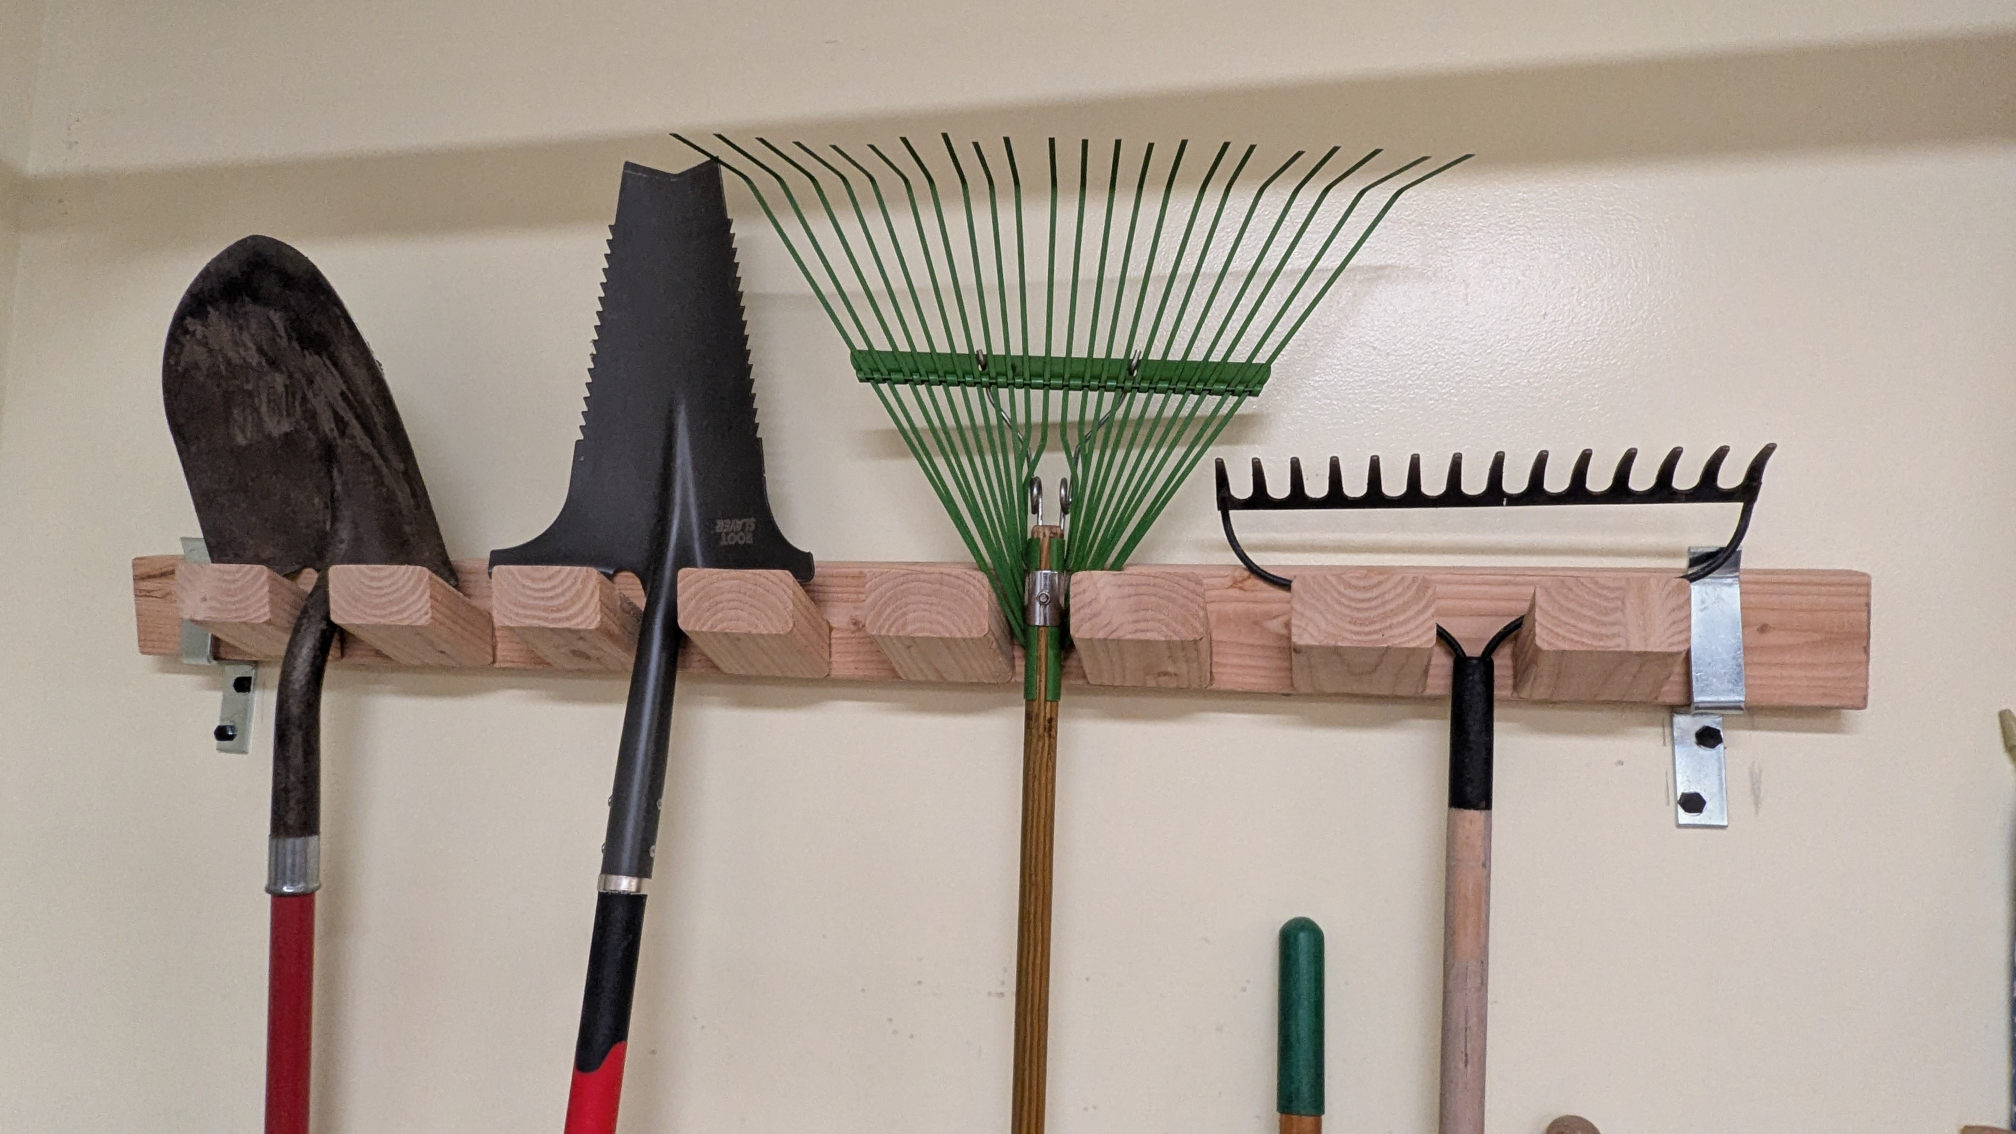
So without further ado, here is my design for a simple garden tool rack that can be made from a single 2x4.
Simple garden tool rack plans
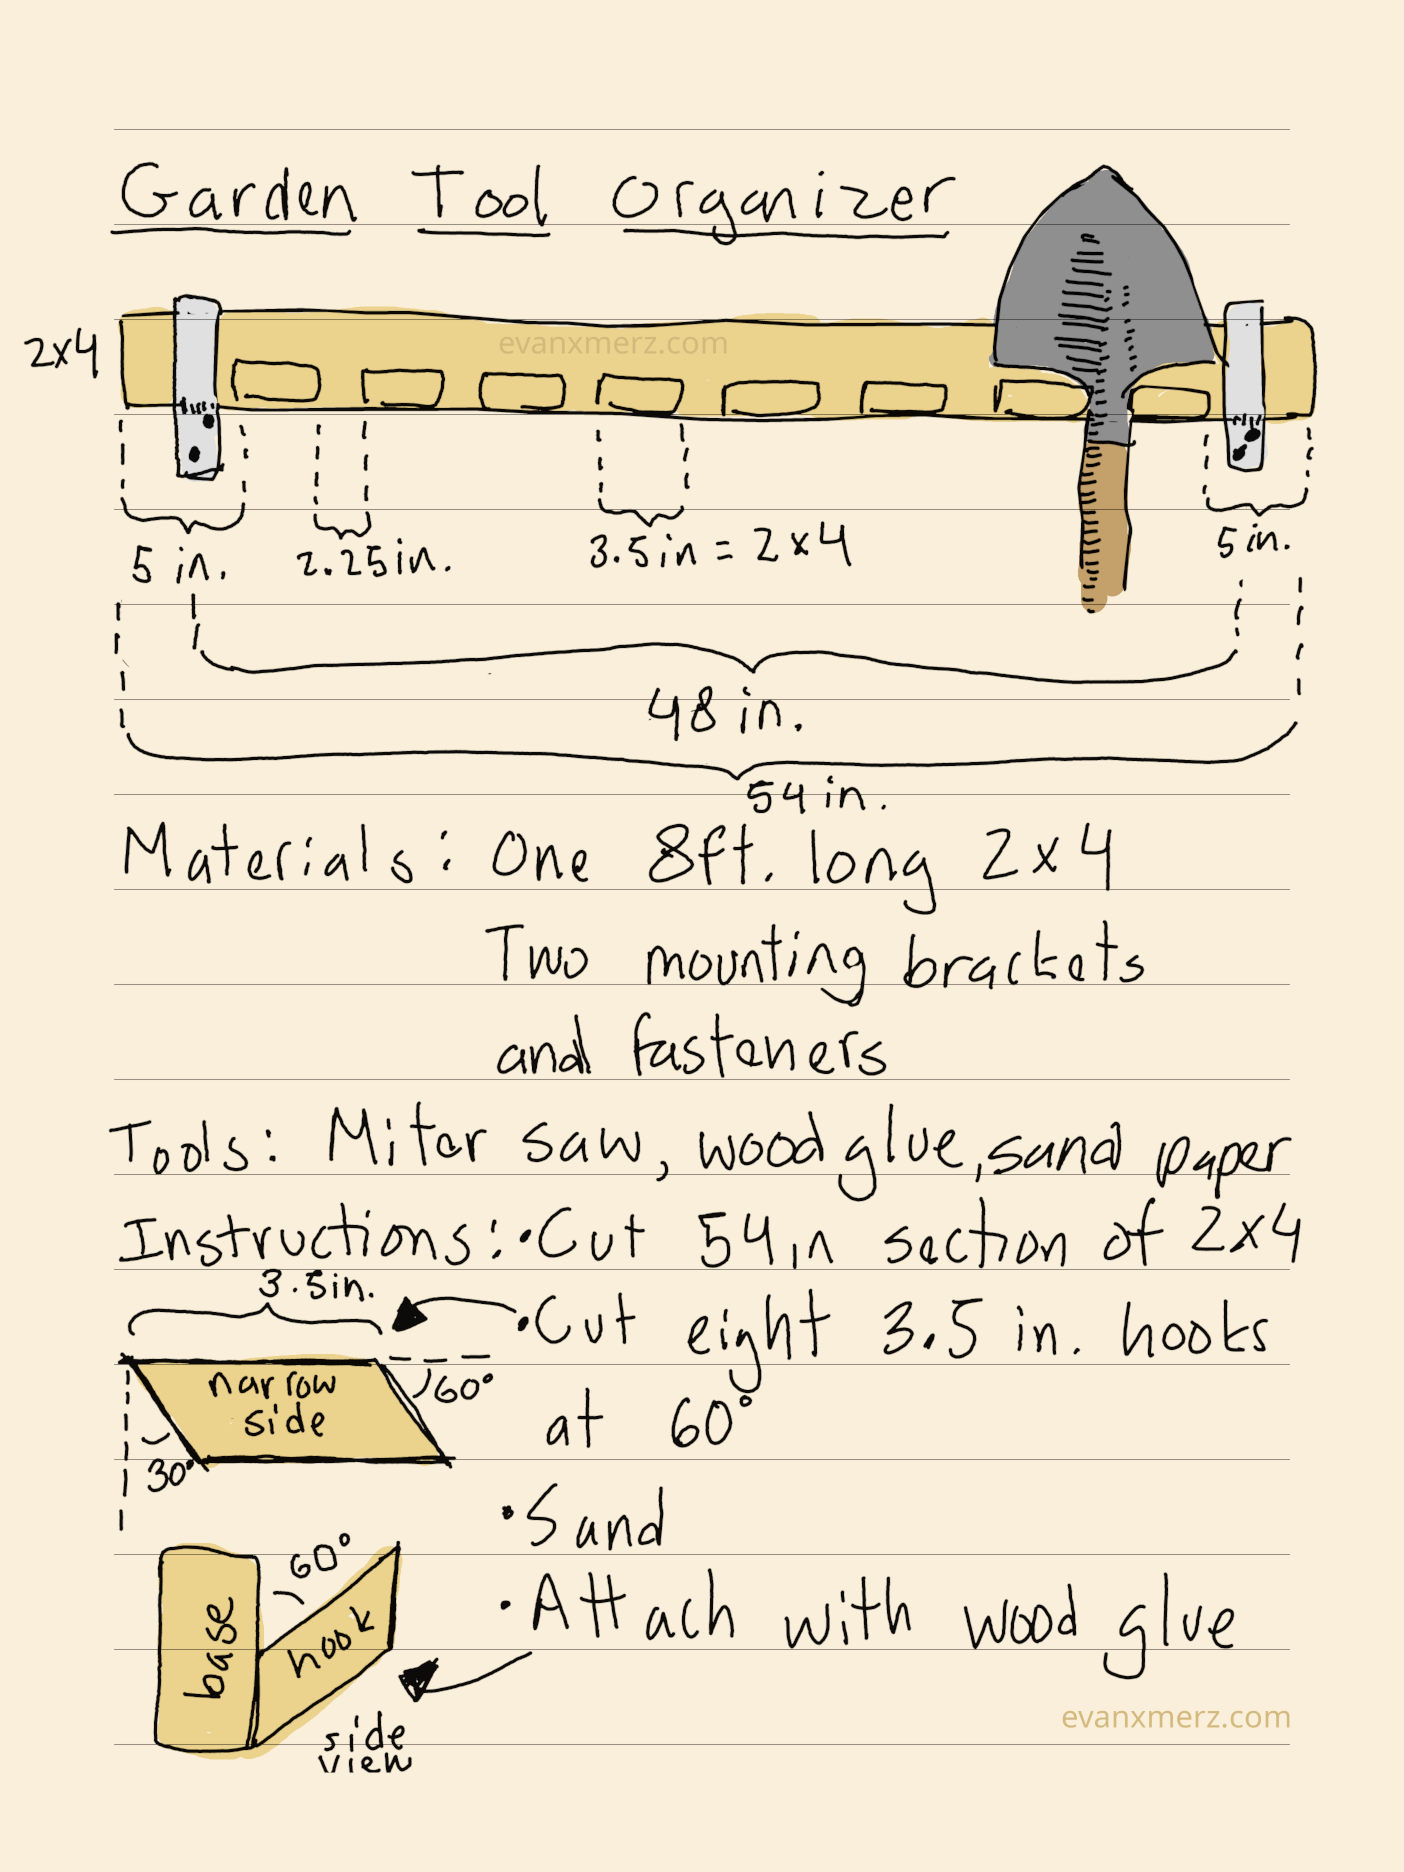
One thing to notice is that the rack itself is made from a single 2x4, however, attaching it to the wall requires some additional materials. There are many ways to attach it to the wall. I chose to use a couple of open brackets that I found at home depot.
The only tools I used to make the rack were a miter saw, a tape measure, and some wood glue. I also used a stud finder, a drill, and a wrench in order to hang it on the wall.
Steps for building a garden tool rack from a single 2x4
The first note about this is that the length I chose was based on the distance between the studs in my wall. I found two good studs that were 4 feet (48 inches) apart, so I built a rack that was 54 inches long to allow space for the brackets. If your studs are spaced differently, then you may have to tweak the length of the base.
Also notice how the hooks are spaced and angled up. I cut them at a 60 degree angle to get them to point upward slightly. I spaced them 2.25 inches apart in order to be able to hold about any garden tool and to fill the entire available space.
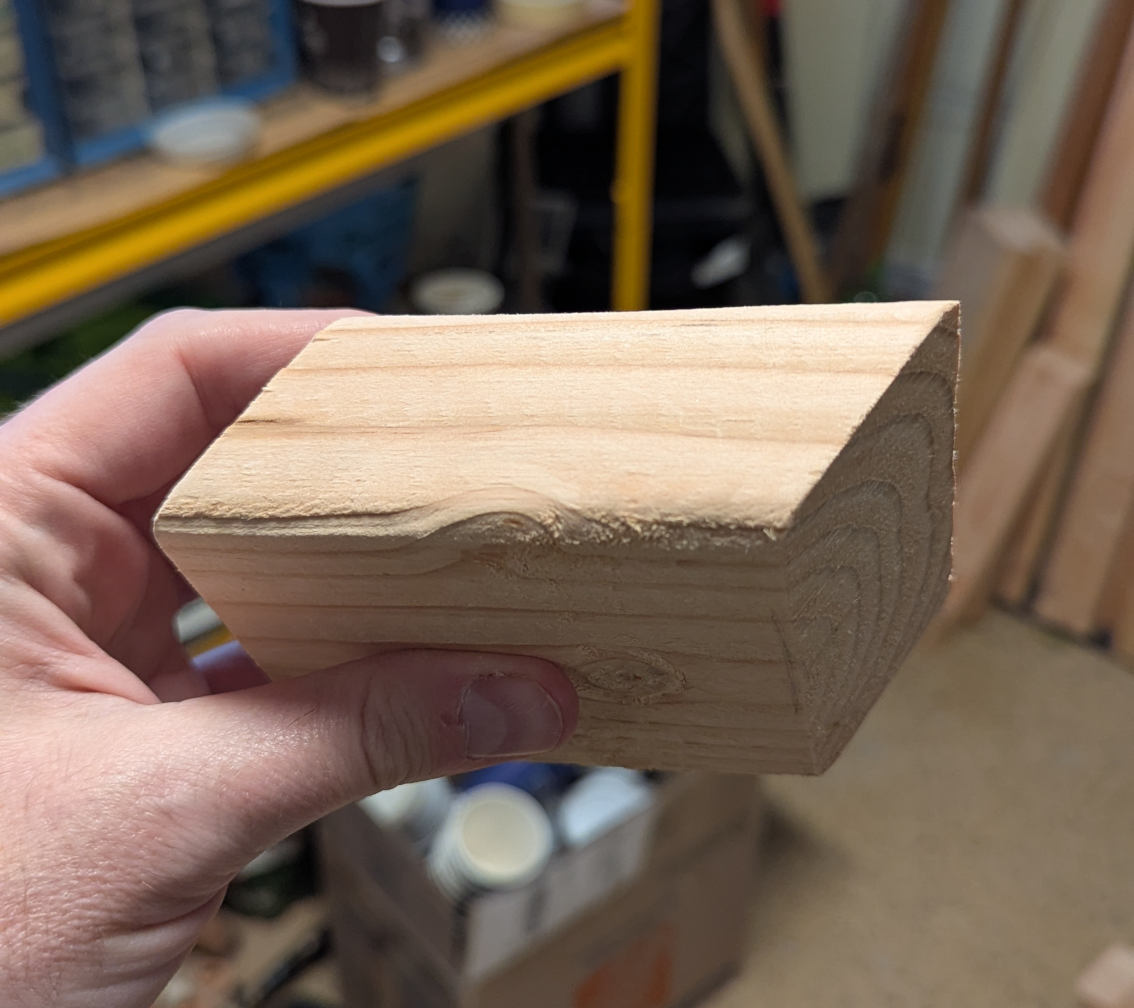
Finally, I assembled this using only wood glue just to keep it simple. If you have particularly heavy tools, or you want to make a sturdier rack, then you may want to secure each hook using a screw or two from the back.
Here are the steps I used:
- Make the base. Cut one length of 2x4 to 54 inches.
- Make the hooks. Adjust your miter saw to an angle of 60 degrees and cut eight lengths of 2x4 at 3.5 inches each.
- Sand each of the hooks.
- Measure five inches from one end of the base. Place a hook on the base at that location and trace around it so that you know where it will go.
- Measure 2.25 inches from the end of the first hook and trace another hook at that location.
- Continue until you've marked the location of each hook.
- Apply wood glue to the bottom of each hook and attach them to the base.
- Wait 24 hours for the glue to dry.
Clamping this up can be a bit tricky, so you might have to be creative with what you have. Just remember that most garden tools aren't very heavy, so it will probably work just fine even if you don't bother with clamps at all.
Lace bugs: The overlooked garden pests
One day this summer when I was watering the younger plants in my native front yard, I noticed some surprising damage on my Toyon bush. Some of the leaves were spotty and discolored. In fact, a lot of the leaves were damaged this way. So many were damaged that the plant was actually losing leaves in the middle of summer (although this picture of the damage was taken in the subsequent fall).

At first I assumed that the plant was just struggling a bit and I gave it a little more water, but when the plant didn't recover in a few weeks, I knew that something more serious was going on.
That's when I investigated for pests, and they were easy to find. The first damaged leaf that I turned over showed me some insects that I had never seen before.

Like most people discovering an insect infestation, I was pretty frightened at first. Especially since I didn't recognize the pest at all.
So I started searching the internet to identify the culprit. I searched for Toyon pest insects, and for sucking insects of California natives, but all I found was the usual suspects. The internet showed me aphids, thrips, and scale, but I knew it wasn't any of those.
I finally turned to an app for identification. I don't remember exactly which app I used as I no longer have it on my phone, but it came up with the identification right away: lace bugs.
As a UC Master Gardener, I had seen most of the common garden pests, so I was curious about how this one had escaped me. It never came up in any of my training, and I've never heard anyone complain about damage from lace bugs. In fact, many people tend to think of the common garden predators lacewings whenever lace bugs are brought up.
It turns out that lace bugs are common garden pests all over the world. They are host-specific sucking insects, which means that each species of lace bug lives off of one species of plant. They put their mouth parts into the underside of the leaves and suck the sap out of the plant.
According to wikipedia, they are most easily identified by their enormous and elaborate wings.
They have 2 sets of wings; a pair of forewings and pronotum wings, which vary in size between individuals, typically having reduced forewings and larger pronotum wings. Despite their apparent beauty, the wings are highly decorative and adults are poor fliers, carrying out their sedentary lifestyle on leaves and the shoots of plants.
The reason that lace bugs are overlooked is that, even with severe infestations such as mine, they typically don't kill a plant. They might make it look a little rough for awhile, but, according to the internet, eventually the local predators will catch up to them and keep them in check.
Unfortunately, despite them being right next to my milkweed that is covered in ladybugs, the local predators don't seem to enjoy eating my lace bugs. So my Toyon lost nearly all its leaves this year and looked quite bare.
As for control measures, I'm now cleaning up the fallen leaves to prevent them from overwintering in the leaf litter. I'm also manually picking them off the plant, but it's impossible to pick them off of every leaf.
So for now I'm hoping to share my experience with you and spread the word about these overlooked garden pests. Hopefully the predators in my yard will catch up to them in 2026.
